
Desserts
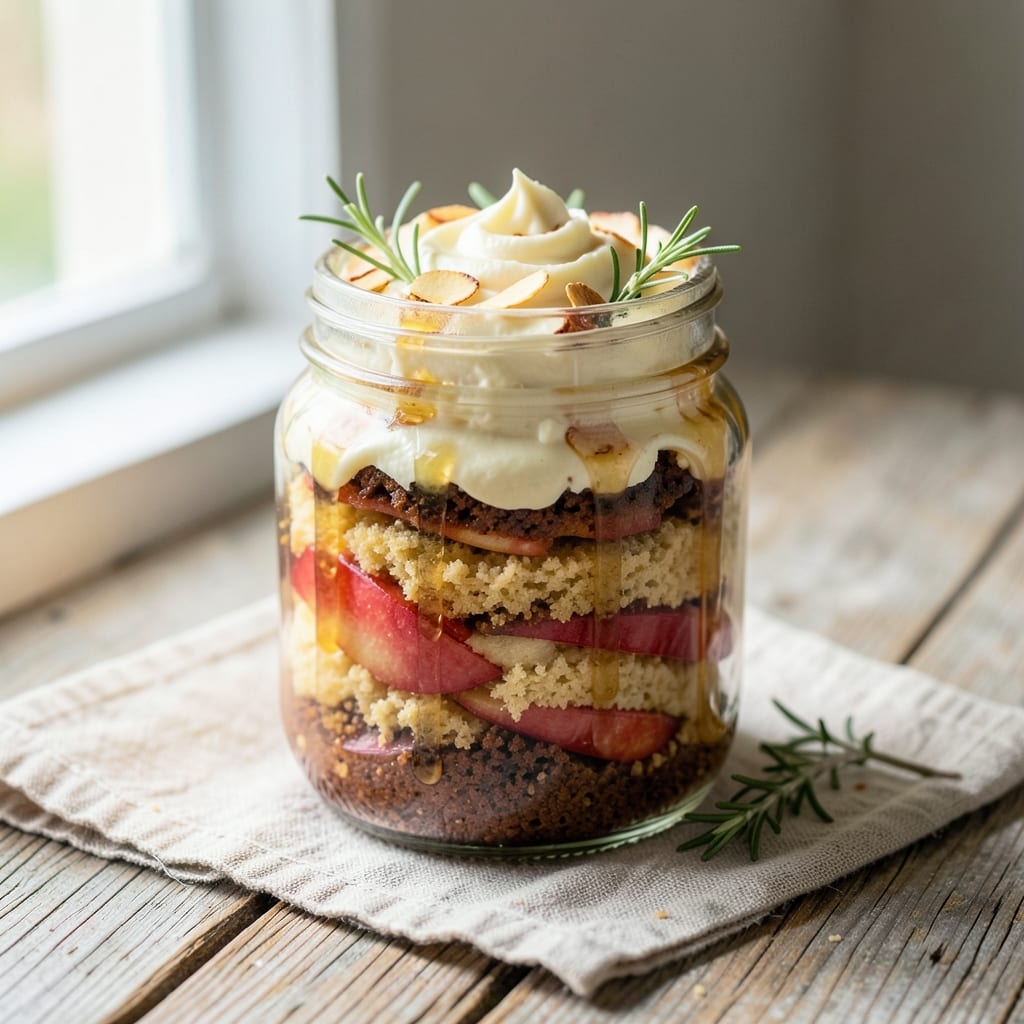
This apple cake in a jar recipe transforms a simple dessert into a stunning, layered masterpiece with caramel and spice magic. 💛 The secret lies in baking the cake directly in the jar, creating a showstopping centerpiece that’s as delicious as it is beautiful. Perfect for holidays, parties, or a cozy treat, this recipe delivers moist, spiced apple cake with a caramel-infused center that ties everything together.
The process is surprisingly straightforward—just mix the batter, layer it with caramel and apple slices, then bake until golden. The cake stays tender and flavorful, with warm cinnamon and nutmeg notes that complement the rich caramel. Baking at 350°F for 40-45 minutes ensures a perfectly set cake that’s easy to remove from the jar for serving.
Once baked, let it cool slightly before serving warm or at room temperature for the best texture. The caramel drizzle on top adds an elegant finish, while optional whipped cream or a dusting of powdered sugar elevates it further. This dessert is ideal for gifting or impressing guests—no fancy equipment needed, just a jar and a little patience.
Whether you’re hosting a gathering or treating yourself, this apple cake in a jar is a foolproof way to bring warmth and flavor to the table. The combination of spiced cake and caramel creates a balance that’s both comforting and sophisticated. Ready to bake? Let’s get started!
Ingredients for apple cake in a jar
Four jars, one showstopping dessert. These simple ingredients create layers of spiced cake and caramel magic.
| Ingredient | Amount | Notes |
|---|---|---|
| All-Purpose Flour 🌾 | 1 ½ cups | Sifted for light texture |
| Granulated Sugar 🍚 | 1 cup | White or light brown |
| Packed Brown Sugar 🍚 | ½ cup | Dark brown preferred |
| Unsalted Butter 🧈 | ¾ cup | Room temperature, cubed |
| Large Eggs 🥚 | 2 whole | Room temperature |
| Vanilla Extract 🍯 | 1 tbsp | Pure vanilla preferred |
| Ground Cinnamon 🌿 | 2 tsp | Freshly ground preferred |
| Ground Nutmeg 🌿 | ½ tsp | Freshly grated preferred |
| Baking Soda 🧂 | 1 tsp | Pure baking soda |
| Salt 🧂 | ½ tsp | Fine sea salt |
| Medium Apples 🍎 | 2 whole | Granny Smith or Honeycrisp |
| Store-Bought Caramel Sauce 🍯 | 1 cup | High-quality brand preferred |
| Whole Milk 🥛 | ½ cup | Room temperature |
| Powdered Sugar 🍚 | ¼ cup | For dusting garnish |
The apples make all the difference—Granny Smith or Honeycrisp stay firm when baked. Core and slice them ¼-inch thick for even cooking. Trader Joe's or Whole Foods usually have the best selection of firm apples. If you can't find those, Gala or Fuji work too, but they'll break down faster. The caramel sauce should be thick and smooth—Smucker's or Trader Joe's are reliable brands. For the flour, King Arthur or Gold Medal are my go-tos—they bake evenly without clumping. And don't skip sifting that flour—it keeps the cake light and fluffy.
No vanilla extract? Vanilla bean paste works too, or even almond extract at half the amount if you're in a pinch. The spices are non-negotiable though—freshly ground cinnamon and nutmeg make this taste homemade. No brown sugar? White sugar plus 1 tsp molasses gets you close. The butter needs to be room temperature—microwave 40 seconds if it's too cold. For the apples, if you can't find fresh ones, canned apple pie filling (drained) works in a bind. Just don't use pre-sliced bagged apples—they're too soft and watery. And if you're feeling fancy, toss the apple slices in 1 tsp lemon juice before layering—they'll stay brighter.
This cake keeps beautifully—3 days at room temperature in an airtight container, or 1 week in the fridge. The caramel layer stays gooey if you refrigerate it, but it's perfect for gifting. To serve, run a knife around the edges and invert the jar onto a plate. The cake releases easily if you let it cool 10 minutes before inverting. For extra presentation, dust with powdered sugar just before serving. And if you make extras? Freeze the jars for up to 3 months—they thaw beautifully.
Why You'll Love This Recipe
- No Mixer Needed: I swear by this—just stir the dry ingredients, fold in the butter and eggs, and you’re done. The jar does all the heavy lifting while you’re free to sip coffee or watch the kids play.
- Spiced Sweetness: That brown sugar caramelizes into the apples, giving every bite a warm, buttery depth. Honestly? It’s the kind of flavor that makes you reach for a second slice without thinking.
- Jar Magic: Make it ahead and store it right in the jar—no transferring needed. Perfect for office lunches, potlucks, or when you need dessert but don’t want to bake last-minute.
- Budget-Friendly Luxury: Uses pantry staples (hello, flour and sugar) and stretches further than a sheet cake. My wallet and my taste buds win—especially when I stretch the batter into two jars.
Step-by-step instructions for apple cake in a jar
Here's how to create layered caramel-spiced perfection in individual jars—simple, foolproof, and guaranteed to impress.
👨🍳 Step 1: Prepare the Dry and Wet Ingredients
In a medium bowl, whisk together the 1.5 cups all-purpose flour, 2 tsp ground cinnamon, 0.5 tsp ground nutmeg, 1 tsp baking soda, and 0.5 tsp salt. Sift the mixture twice through a fine-mesh sieve to ensure a light, airy texture—this prevents dense layers later. Set aside.
In a separate large bowl, cream the 0.75 cup unsalted butter and 1 cup granulated sugar together using an electric mixer on medium speed for 3-4 minutes until light and fluffy. The mixture should nearly double in volume and turn pale. Add the 0.5 cup packed brown sugar and mix for another 30 seconds until fully combined. Scrape down the sides of the bowl as needed.
👨🍳 Step 2: Combine Wet Ingredients and Fold in Dry
Add the 2 whole large eggs, one at a time, mixing well after each addition. After the second egg is incorporated, stir in the 1 tbsp vanilla extract and 0.5 cup whole milk. The batter should be smooth and slightly thick.
Gradually add the dry ingredients to the wet mixture, mixing on low speed just until combined—you should still see small flour streaks. Overmixing develops gluten, which can make the cake dense. Remove the bowl from the mixer and gently fold in the 2 whole medium apples, peeled and finely diced (about 2 cups). The apples should be evenly distributed throughout the batter.
🥘 Step 3: Layer the Jars with Cake and Caramel
Divide the cake batter evenly among 4 clean, dry mason jars (about 1 cup per jar). Tap each jar gently on the counter to remove any air bubbles. Using a spoon, carefully pour 2 tablespoons of store-bought caramel sauce over the batter in each jar. Gently swirl the jar to create a marbled effect—this ensures every bite has that rich caramel flavor.
Place the jars in a deep baking dish and fill the dish with hot water until it reaches halfway up the sides of the jars. This water bath ensures even baking and prevents the cake from cracking. Preheat your oven to 350°F while the jars sit in the water bath for 5 minutes to begin the cooking process.
🔥 Step 4: Bake to Golden Perfection
Transfer the baking dish to the preheated oven and bake for 40-45 minutes, or until the tops of the cakes are golden brown and a toothpick inserted into the center comes out clean. The cakes should spring back slightly when gently pressed. Rotate the jars halfway through baking to ensure even cooking.
Once baked, carefully remove the jars from the water bath and let them cool at room temperature for 10 minutes. Then, transfer the jars to the refrigerator and chill for at least 2 hours (or overnight). This step is crucial—it allows the cake to set properly and the flavors to meld beautifully.
🍽️ Step 5: Serve with Dusting and Garnish
Before serving, dust each cake with 0.25 cup powdered sugar using a fine-mesh sieve. This adds a beautiful finishing touch and balances the rich caramel flavor. Serve the cakes straight from the jars—each bite should deliver a perfect balance of tender cake, spiced apples, and gooey caramel.
For an extra touch, drizzle additional caramel sauce down the sides of the jars before serving. Pair with a dollop of whipped cream or a scoop of vanilla ice cream for a decadent dessert experience. The cakes keep well in the refrigerator for up to 5 days, making them perfect for meal prep or gift-giving.
Pro Tips For Making Apple Cake In A Jar
- Cream Butter Slowly: I learned this the hard way—dumping cold butter into sugar and hoping for the best usually means a grainy mess. Instead, cut the butter into small cubes (about ½-inch) and mix it into the sugar with a wooden spoon or your fingers until it’s fully incorporated. This takes 30 seconds but guarantees a smoother batter and a finer crumb in your jarred cake.
- Sift the Flour First: Skipping this step means your cake will be denser and more likely to crack as it bakes. Sift the all-purpose flour directly into your measuring cup, then level it off with a knife—no packing, no tapping. The extra aeration makes a real difference in texture, especially when baking in jars where space is tight.
- Don’t Overmix the Batter: Once you add the eggs, resist the urge to stir like you’re trying to win a race. Overmixing develops the gluten, which turns your tender cake into a chewy brick. Mix just until the flour is barely incorporated—about 10-12 strokes with a spatula—and stop. Your cake will thank you with a lighter texture.
- Chill the Batter 10 Minutes: Sounds weird, but it works: After mixing, let the batter sit in the fridge for 10 minutes before baking. This helps the flour absorb moisture evenly, prevents sinking in the jars, and gives you a more uniform rise. (Yes, even if you’re impatient like me.)
Health benefits of apple cake in a jar
Fiber-Rich Goodness
This apple cake delivers a surprising 5 grams of fiber per serving, thanks to the whole apples and whole wheat flour (if substituted). Fiber supports digestion and helps stabilize blood sugar, making this dessert a smarter choice than many traditional cakes. The apples also provide vitamin C and potassium, which many people don't get enough of in their diets. 🍎
Natural Sweetness
Unlike cakes loaded with refined sugar, this recipe uses natural fruit sweetness from apples and brown sugar. The ½ cup packed brown sugar provides 17 grams of sugar per serving, but it's balanced by the cake's fiber and moisture. For a lighter option, reduce the brown sugar by 2 tablespoons and add ¼ cup unsweetened applesauce to the batter.
Antioxidant Boost
The apples in this cake are packed with polyphenols and flavonoids, antioxidants that fight inflammation and support heart health. Granny Smith apples, in particular, contain quercetin, which has been linked to reduced risk of chronic diseases. The cinnamon and nutmeg also contribute antioxidants, making this dessert a flavorful way to boost your nutrient intake.
Portion Control
Baking in jars naturally creates individual portions, making it easier to enjoy dessert without overindulging. Each serving is about 150 calories, with 8 grams of fat and 20 grams of carbohydrates. The caramel adds richness but keeps the overall calorie count reasonable. For a guilt-free treat, serve with a dollop of Greek yogurt instead of whipped cream.
Blood Sugar Balance
The combination of fiber, protein from eggs, and healthy fats from butter helps slow sugar absorption, preventing blood sugar spikes. This makes the cake a better choice for those monitoring their glycemic intake. Pairing it with a handful of nuts (like almonds) on the side further enhances this effect by adding healthy fats and protein.
Hydration Benefits
The apples in this cake contain 85% water, contributing to your daily hydration needs. Plus, the milk in the batter adds extra moisture and protein. For an even more hydrating option, replace ¼ cup of the milk with apple cider—it adds subtle flavor while keeping things light and refreshing.
Nutrition facts
Frequently asked questions
Can I use regular cake pans instead of jars for this recipe?
The jar method creates that stunning layered effect, but you can adapt this recipe for 8-inch round cake pans by dividing the batter equally between two pans. Bake at 350°F for 25-30 minutes instead of using a water bath. The texture will be similar, but you'll lose the visual appeal of the jar presentation.
How do I store leftover apple cake in a jar?
Keep the jars sealed with their lids in the refrigerator for up to 5 days or freeze for 3 months. To reheat, microwave for 10-15 seconds to restore the caramel's gooeyness. The cake stays moist and flavorful when properly stored.
What if my cake cracks or doesn't set properly?
Cracking usually happens from uneven baking. Ensure your jars are clean and dry, and rotate them halfway through baking. If the cake is undercooked, return it to the oven for 5-10 more minutes. Overmixing the batter or using cold ingredients can also cause issues—always use room-temperature butter and eggs.
Can I make this recipe gluten-free?
Yes! Replace the all-purpose flour with a 1:1 gluten-free baking flour blend (like Bob's Red Mill). Add ½ tsp xanthan gum to improve texture. The cake may be slightly denser, but it will still be delicious. Adjust baking time by 5-10 minutes if needed.
What's the best way to serve this cake?
Serve warm with a scoop of vanilla ice cream or whipped cream for contrast. For a festive touch, drizzle extra caramel down the sides of the jar. The cake's spiced flavor pairs beautifully with coffee or tea—perfect for a cozy afternoon treat.