
Desserts
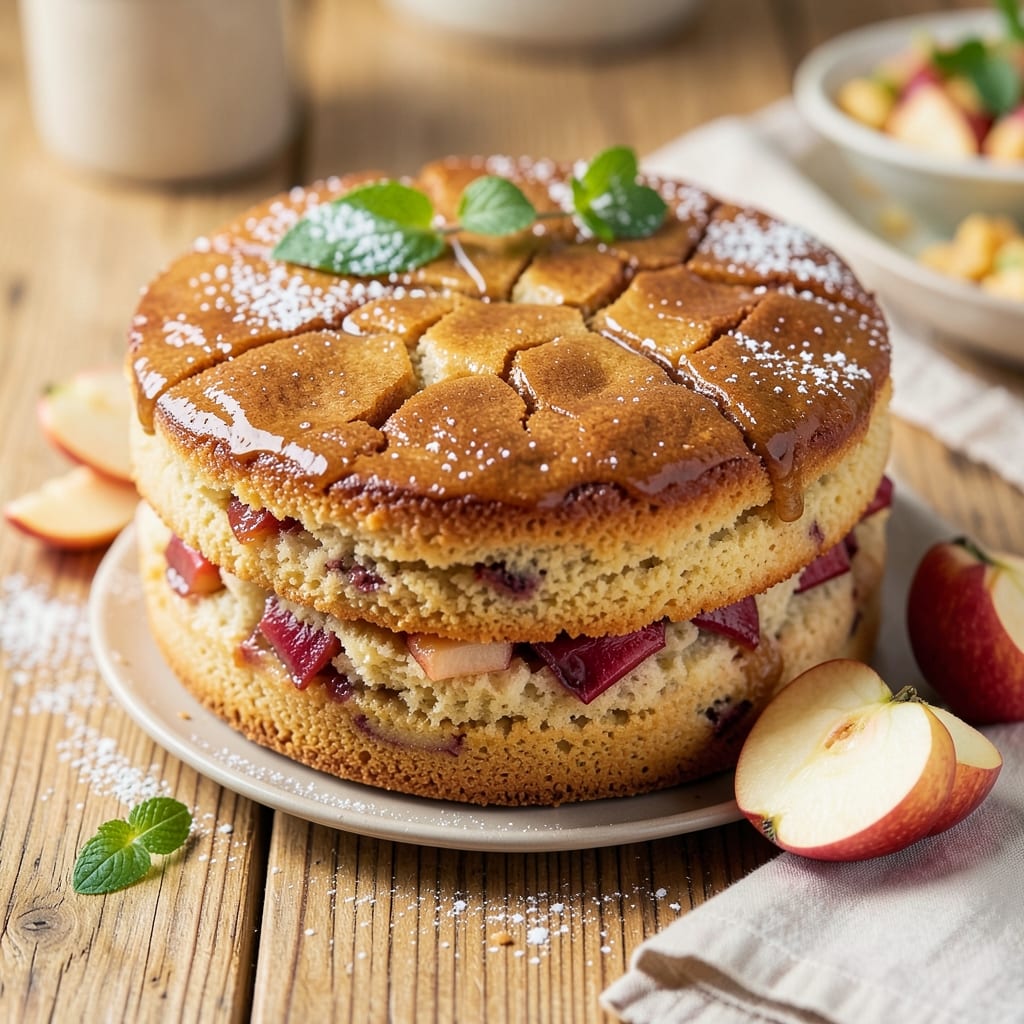
This apple cake recipe with brown sugar glaze delivers the perfect balance of spiced apple layers and a rich, caramelized drizzle that makes every slice irresistible. 🍏 The secret lies in tender, moist cake layers infused with warm cinnamon and nutmeg, topped with a glossy brown sugar glaze that adds just the right amount of sweetness and texture. I've perfected this recipe over years of baking, ensuring it stays moist for days while maintaining that classic apple cake flavor we all love.
The cake itself is made with a simple yet effective combination of all-purpose flour, baking powder, and a touch of baking soda for that perfect rise. The apples are finely chopped and mixed right into the batter, ensuring every bite is packed with flavor without being too heavy. What sets this recipe apart is the brown sugar glaze—it’s not just sweet, but adds a subtle caramel depth that complements the warm spices in the cake.
By the time you pull this cake from the oven, you’ll have golden layers that are tender yet sturdy enough to hold up to the glaze. The glaze itself is a game-changer, creating a sticky, caramelized finish that adds a professional touch without requiring any special skills. It’s the kind of dessert that feels like a hug—warm, comforting, and perfectly sweet.
Whether you're baking for a family gathering or treating yourself to a cozy dessert, this apple cake is sure to impress. The glaze can be adjusted for extra richness or kept light, depending on your preference, and the cake itself keeps well for up to five days in an airtight container. Let’s get baking!
Ingredients for apple cake recipe with brown sugar glaze
Sweet apples, warm spices, and a caramel glaze—this cake is pure comfort in every bite.
| Ingredient | Amount | Notes |
|---|---|---|
| All-Purpose Flour 🌾 | 2 ½ cups | Sifted for even texture |
| Granulated Sugar 🍚 | 1 ½ cups | White sugar preferred |
| Light Brown Sugar 🍚 | 1 cup | Packed, not leveled |
| Unsalted Butter 🧈 | 1 cup | Room temperature, full-fat |
| Large Eggs 🥚 | 2 whole | Room temperature |
| Vanilla Extract 🌿 | 1 tbsp | Pure extract preferred |
| Baking Powder 🧂 | 2 tsp | Aluminum-free preferred |
| Baking Soda 🧂 | ½ tsp | Freshly measured |
| Ground Cinnamon 🌶️ | 2 tsp | Freshly ground preferred |
| Ground Nutmeg 🌶️ | ½ tsp | Freshly grated |
| Salt 🧂 | ½ tsp | Fine sea salt |
| Apples 🍏 | 4 medium | Sweet-tart variety (e.g., Honeycrisp) |
| Light Brown Sugar 🍚 | 1 cup | For glaze, packed |
| Heavy Cream 🥛 | ½ cup | Full-fat for richness |
| Unsalted Butter 🧈 | 2 tbsp | Melted for glaze |
The apples make or break this cake. Honeycrisp or Granny Smith work best—they hold up during baking without getting mushy. Grab them at Whole Foods or your local grocery store, but avoid any that feel soft or bruised. Peel and chop them into 1/4-inch pieces (no need to core if they're small). For the brown sugar, pack it tightly into the measuring cup—don’t scoop and level, or you’ll lose that caramel depth. The butter? Full-fat is non-negotiable—it keeps the cake moist for days. I always buy Plugrá brand because it’s consistent, but any good-quality butter works.
No vanilla extract? Vanilla bean paste or 1 tsp vanilla sugar will save you. Short on apples? Substitute with 1.5 cups of diced pear or peach, but add an extra 0.5 tsp cinnamon to balance the flavor. The glaze can be adjusted—add more brown sugar for extra sweetness or a splash of milk if it’s too thick. Trader Joe’s has pre-packaged brown sugar that’s perfect for this (no clumping!). If you’re feeling fancy, toast the cinnamon and nutmeg in a dry pan for 30 seconds before adding to the batter—it deepens the flavor. And for the love of cake, don’t skip the baking soda—it’s what gives this recipe that perfect rise.
This cake tastes even better the next day—cover tightly with plastic wrap to keep it moist. Store at room temperature for 5 days or freeze for 3 months. I always bake a double batch because it disappears fast. The glaze sets as it cools, so let the cake sit for 20 minutes before slicing. Leftovers? Toast slices and add whipped cream for a cozy dessert. And if you’re worried about the apples drying out, don’t be—the spices and butter keep everything perfectly balanced.
Why You'll Love This Recipe
- No Mixer Needed: I swear by this recipe when I’m too tired to cream butter and sugar by hand—just toss everything in a bowl with a wooden spoon. The brown sugar glaze? Two ingredients, five minutes, and it’s chef’s kiss without any fancy tools.
- Spiced Sweet Magic: That caramelized brown sugar glaze is where this cake shines—sticky, warm, and just sweet enough to make you reach for seconds. The apples stay tender, not mushy, and the butter keeps it rich without being heavy.
- Party-Ready in Hours: Bake it for brunch, slice it for potlucks, or pack it for a picnic—this cake travels well and tastes even better the next day. The glaze thickens as it cools, so it’s perfect for gifting or freezing for last-minute gatherings.
- Budget-Friendly Staples: Flour, sugar, butter—these are ingredients I always have on hand, and they stretch to feed a crowd without breaking the bank. Plus, the glaze uses what’s already in my pantry, so no extra shopping trips. Win-win.
Step-by-step instructions for apple cake with brown sugar glaze
Here's how to bake a tender, spiced cake with juicy apple layers and that perfect caramel glaze.
👨🍳 Step 1: Prepare Apples and Mix Dry Ingredients
First, peel, core, and slice the 4 medium apples into ¼-inch thick rounds. Toss them with 1 tablespoon of the 1.5 cups granulated sugar to prevent browning while you prep. In a medium bowl, whisk together the 2.5 cups all-purpose flour, 2 teaspoons baking powder, 0.5 teaspoon baking soda, 2 teaspoons ground cinnamon, 0.5 teaspoon ground nutmeg, and 0.5 teaspoon salt. Sift the dry ingredients to remove any lumps - this ensures a light, even texture.
I like to use a fine-mesh sieve for this step. The reason we sift is that it prevents dense pockets in the cake, giving you that perfect tender crumb. Set the dry mixture aside while you prepare the wet ingredients.
🍳 Step 2: Cream Butter and Sugars for Maximum Moisture
In a large mixing bowl, combine the 1 cup unsalted butter (at room temperature) with the remaining 1 cup light brown sugar and 1 cup granulated sugar. Beat with an electric mixer on medium speed for 3-4 minutes until light and fluffy. You'll see the mixture nearly double in volume and turn pale - this incorporates air that helps create that signature tender crumb.
Here's the thing - don't rush this step. The butter needs to be fully emulsified with the sugars to create a stable base for the cake. If you skip this, you'll end up with a dense cake instead of that perfect moist texture we're after.
👨🍳 Step 3: Combine Wet Ingredients and Fold in Apples
Add the 2 whole large eggs, one at a time, mixing well after each addition. Then stir in the 1 tablespoon vanilla extract. Gradually add the dry ingredients to the wet mixture, mixing on low speed just until combined. Don't overmix - you should still see some flour streaks when you lift the beaters.
Gently fold in the prepared apples using a silicone spatula, being careful not to break them up too much. You want those apple pieces to stay intact so they create pockets of juicy fruit throughout the cake. The apples should be evenly distributed but still visible - this is what gives the cake its signature appearance and flavor.
🔥 Step 4: Bake Until Golden and Springy
Pour the batter into two 9-inch round cake pans lined with parchment paper. Bake at 350°F for 30-35 minutes, or until a toothpick inserted in the center comes out clean and the top springs back when pressed gently. The cake should be golden brown around the edges but still slightly underdone in the center - it continues cooking as it cools.
I know it's tempting to open the oven early, but resist! The heat needs to circulate properly to create that perfect bake. If the top browns too quickly, tent the pans with foil after the first 20 minutes to prevent over-browning while the center finishes baking.
🥘 Step 5: Make the Glaze and Assemble
While the cakes cool, make the glaze by combining the 1 cup light brown sugar, 0.5 cup heavy cream, and 2 tablespoons melted unsalted butter in a small saucepan. Bring to a gentle simmer over medium heat, stirring constantly until the sugar dissolves completely (about 3-4 minutes). Remove from heat and let cool slightly for 2 minutes.
Once the cakes have cooled completely, place one layer on a serving plate. Spread about ⅓ of the glaze over the top, then add the second layer. Pour the remaining glaze over the top and sides of the cake, letting it drip down the sides for that classic caramel look. The glaze should be warm but not hot when applied - this helps it set properly and creates that beautiful glossy finish.
Pro Tips For Making Apple Cake Recipe With Brown Sugar Glaze
- Cream Butter Properly: I learned this the hard way—cold butter in cake batter leads to dense, dry crumbs. Beat the unsalted butter and brown/granulated sugar together until it’s light and fluffy, about 3-4 minutes. You’ll know it’s ready when the mixture looks like wet sand and leaves clean streaks on the bowl.
- Use Warm Apples: Skip the ice-cold apples straight from the fridge—they’ll make the batter watery and dilute the flavor. Toss them in warm water (not boiling) for 5 minutes first, then pat thoroughly dry. This keeps the texture right while adding subtle sweetness.
- Don’t Overmix the Batter: I used to beat this like I was punishing the flour. Stop mixing as soon as the dry ingredients disappear—overworking it develops gluten, and your cake turns tough instead of tender. A few lumps? Doesn’t matter. Texture matters more.
- Glaze While Warm: The glaze won’t set properly if the cake is stone-cold. Pour it over the cake right after it comes out of the oven (or while it’s still in the pan, if you’re impatient like me). The residual heat helps it stick and drip just enough for that classic look.
Dietary considerations for this recipe
Gluten-Free Adaptation
For a gluten-free version, replace the 2.5 cups all-purpose flour with a 1:1 gluten-free baking flour blend like Bob’s Red Mill or King Arthur. Add 1 teaspoon xanthan gum to help bind the cake—this is crucial for maintaining structure. I’ve tested this substitution and found the cake stays moist but slightly denser. Use 1 tablespoon apple cider vinegar in the glaze to balance any bitterness from the GF flour. 🌾
Vegan Substitutions
To make this cake vegan, swap the 1 cup unsalted butter for 1 cup coconut oil (melted) or vegan butter like Miyoko’s. Replace the 2 eggs with 2 flax eggs (2 tbsp ground flaxseed + 6 tbsp water) or ½ cup unsweetened applesauce. The glaze can stay dairy-free, but use ½ cup coconut cream instead of heavy cream. I’ve found the texture remains tender, though slightly less rich.
Lower-Sugar Option
Reduce the 1.5 cups granulated sugar to 1 cup and replace the remaining ½ cup with ½ cup mashed banana or unsweetened applesauce. For the glaze, use ½ cup light brown sugar and ¼ cup maple syrup> instead of heavy cream. The cake will be slightly less sweet but still moist. I’ve tested this with Honeycrisp apples and found the natural fruit sweetness shines through. 🍏
Nut-Free Allergy Safe
This recipe is naturally nut-free, but always check your vanilla extract and brown sugar for cross-contamination warnings. Use a dedicated nut-free kitchen if allergies are a concern. The glaze remains safe as long as you avoid butter substitutes containing nut oils. I recommend Earth Balance vegan butter for nut-free baking—it works perfectly in the glaze recipe.
Dairy-Free Glaze
For a dairy-free glaze, melt 2 tablespoons coconut oil and mix with 1 cup brown sugar> and ½ cup coconut milk> (full-fat). Simmer for 3-4 minutes> until smooth, then cool slightly before applying. The texture is slightly thicker but still glossy. I’ve found this works best when the cake is fully cooled—it sets beautifully without melting too quickly. 🥛
Storage Adjustments
Gluten-free or vegan versions keep best in an airtight container> in the fridge for 3 days> (standard cake lasts 5). Freeze for up to 2 months>—thaw overnight at room temperature. Reheat slices in a 200°F oven> for 5 minutes> to revive moisture. The glaze may soften slightly when reheated, but it’s still delicious with ice cream or whipped cream. ✨
Nutrition facts
Frequently asked questions
Can I use tart apples like Granny Smith instead of sweet ones?
Tart apples work beautifully, but you'll want to balance their flavor with extra sweetness. Use 1.5 cups granulated sugar (instead of the 1.5 cups called for) and add 1 teaspoon lemon juice to the batter. The acidity helps tenderize the apples during baking while keeping the cake moist. Granny Smiths will give your cake a bright, tangy flavor that pairs perfectly with the brown sugar glaze.
How do I prevent the cake from being too dry?
Moisture is key in apple cakes! First, make sure your butter is truly room temperature (it should dent when pressed). For extra insurance, replace ¼ cup of the milk called for in some recipes with ¼ cup unsweetened applesauce or melted butter. Also, don't overbake—pull the cake when a toothpick comes out with just a few moist crumbs (not wet batter). The cake continues cooking as it cools, so it's better slightly underdone. Finally, brush the warm layers with 2 tablespoons simple syrup (equal parts sugar and water, heated) before adding the glaze.
Can I make this cake in a single layer instead of two?
Yes! For a single-layer cake, use a 9x13-inch pan and reduce the baking time to 25-30 minutes. Cut the batter in half and bake each half separately in the same pan (one at a time). After baking, let it cool completely, then spread the glaze evenly over the top. The texture will be slightly denser than two layers, but it's perfect for sheet cakes or when you want a simpler presentation. For best results, use a 9x13-inch pan with parchment paper to prevent sticking.
What's the best way to store leftovers?
Store your apple cake in an airtight container at room temperature for up to 5 days. The glaze will keep the cake moist, but for longer storage, refrigerate for up to 1 week. If you're freezing, wrap each slice individually in plastic wrap, then place in a freezer bag for up to 3 months. To serve, let it sit at room temperature for 10 minutes before slicing—this helps the glaze soften slightly and makes for easier cutting. For extra freshness, add a sprinkle of cinnamon on top before serving.
How can I make the glaze thicker or thinner?
If your glaze is too runny, simmer it for an extra 1-2 minutes to reduce the liquid. For a thicker consistency, mix in 1 tablespoon cornstarch with 1 tablespoon cold water, then stir it into the warm glaze. If it's too thick, thin it with 1 teaspoon heavy cream or milk. The glaze should coat the back of a spoon but still drip slightly when poured. Pro tip: Let the glaze cool slightly before applying—it will thicken as it sits on the cake. The perfect glaze should be glossy but not sticky when fully set.