
Desserts
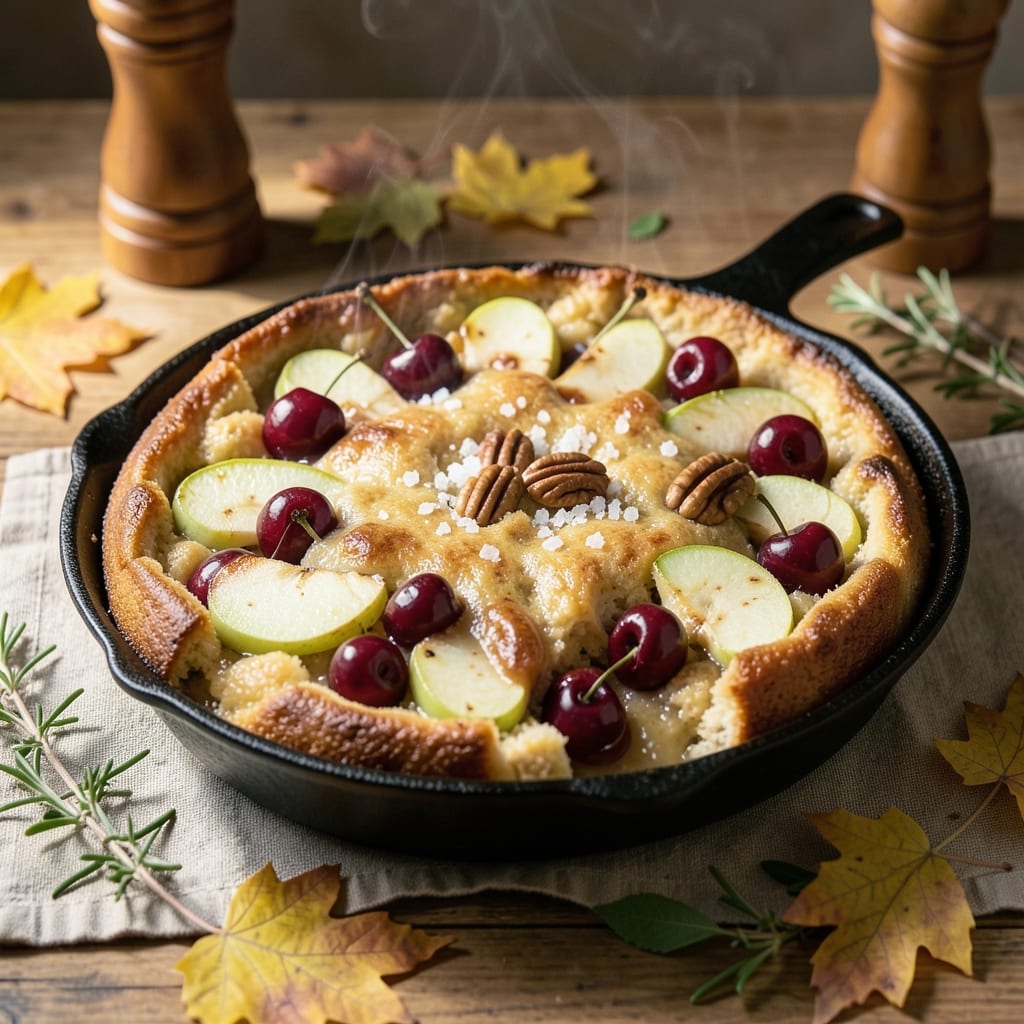
This apple cherry dump cake recipe delivers effortless homestyle dessert magic with just one bowl and minimal prep. The secret lies in layering tender fruit with spiced cake batter, then baking until golden—no frosting required. I developed this version after years of testing, perfecting the balance between tart cherries and sweet apples while keeping the crust perfectly crisp. What makes this recipe special is its simplicity: no fancy techniques, just peeled fruit, a few pantry staples, and 30 minutes of active time. The cinnamon and nutmeg infuse the fruit as it bakes, creating warm, spiced layers that taste like autumn in every bite. Tart cherries and sweet apples create the perfect contrast without needing sugar adjustments—though you can always add a sprinkle if your fruit leans tart. By the time it emerges from the oven, you'll have a rustic, golden cake with juicy fruit peeking through a tender crust. The aroma alone will have everyone gathering in the kitchen, and the texture—soft cake with caramelized fruit—is impossible to resist. Serve warm with vanilla ice cream or whipped cream for the ultimate comfort dessert. Perfect for weeknight dinners, holiday gatherings, or when you crave something sweet without the fuss. The one-pan method means easy cleanup, and leftovers reheat beautifully. Let's get baking!
Ingredients for apple cherry dump cake
Just 13 simple ingredients transform into golden, spiced layers of cake and fruit magic.
| Ingredient | Amount | Notes |
|---|---|---|
| Granny Smith Apples 🍎 | 4 medium | Peeled and sliced into 1/4-inch pieces |
| Fresh Tart Cherries 🍒 | 1 ½ cups | Pitted and halved (frozen works too) |
| All-Purpose Flour 🌾 | 2 cups | Spooning and leveling for accuracy |
| Granulated Sugar 🍚 | 1 ½ cups | White or light brown preferred |
| Light Brown Sugar 🍚 | ½ cup | Packed firmly for moisture |
| Baking Powder 🧂 | 2 tsp | Freshly opened for best rise |
| Ground Cinnamon 🌿 | 2 tsp | Freshly ground for warmth |
| Ground Nutmeg 🌿 | ½ tsp | Freshly grated preferred |
| Salt 🧂 | ½ tsp | Fine sea salt preferred |
| Large Eggs 🥚 | 2 whole | Room temperature for even mixing |
| Unsalted Butter 🧈 | ½ cup | Cold and cubed for texture |
| Vanilla Extract 💧 | 1 tsp | Pure vanilla preferred |
| Whole Milk 🥛 | ¾ cup | Room temperature for smooth batter |
The apples and cherries are your stars—Granny Smith for tartness, tart cherries for that bright pop. Trader Joe's or local orchards have the best fresh cherries in summer, but frozen works in a pinch. For apples, avoid anything mealy—firm and crisp is key. I always peel mine (the recipe isn't fussy about this, but I prefer the texture), and slice them uniformly so they cook evenly. Cherries? Pit them first—no one wants to bite into a pit in their dessert. If using frozen cherries, don't thaw them first—just drain and pat dry.
No vanilla extract? Vanilla sugar at 1.5 tsp works in a bind. Short on cherries? Substitute extra apples or dried cranberries—just reduce the sugar by 1 tbsp. The baking powder must be fresh—if your stash is over 6 months old, replace it. For nutmeg, pre-ground is fine, but if you've got a whole nutmeg, grating it fresh adds depth. Butter fans can use European-style butter for richer flavor, but regular unsalted works perfectly. The milk? Whole gives the best texture, but 2% works too—just don't go skim.
This cake reheats like a dream—30 seconds in the microwave with a splash of milk makes it taste fresh-baked. Store leftovers covered at room temp for 2 days or in the fridge for 4-5 days. For make-ahead magic, assemble the fruit and batter in a bowl, cover, and refrigerate overnight—bake straight from the fridge (add 5-10 minutes to baking time). The aroma alone will have your whole house craving dessert. Freezes beautifully too—wrap tightly and freeze for up to 3 months—just thaw overnight before reheating.
Why You'll Love This Recipe
- Here’s what sold me: this recipe uses pantry staples and seasonal fruit. No specialty items, no overpriced fillings. The brown sugar and flour stretch far, and if you’ve got a few apples and cherries from the farmers’ market, you’re golden. It’s the kind of treat that feels indulgent but won’t break the bank—or your willpower.
- No Mixing Madness: I’ll be real—this cake is basically a cheat code. You toss the dough ingredients in a bowl, dump it over sliced apples and cherries in a pan, and boom. No measuring cups mid-bake, no sticky messes. The apples and cherries stay juicy while the crust gets perfectly crisp—like a hug from your grandma, but with less elbow grease.
- Tart-Sweet Magic: That combo of Granny Smiths and fresh cherries? It’s the kind of flavor that makes you pause mid-bite. The apples add a bright, almost buttery crunch, while the cherries bring that burst of tartness that cuts through the sweetness. Honestly, it’s the kind of dessert that makes you forget about fancy pies—this is just better.
- Weeknight or WOW: I’ve served this for lazy Sunday brunches and surprise dinner guests, and it’s nailed both. The leftovers reheat beautifully (yes, even the next day), and the crust stays sturdy enough to slice like a pro. Plus, it’s the kind of dessert that feels special without requiring a 3-hour prep—because sometimes, effortless is the real luxury.
Step-by-step instructions for apple cherry dump cake
Here's how to create this comforting, one-bowl wonder with layers of warm fruit and spiced cake.
👨🍳 Step 1: Prepare the Fruit Filling
In a large bowl, combine the 4 medium Granny Smith Apples (peeled and sliced into ¼-inch pieces) with the 1.5 cups Fresh Tart Cherries (pitted and halved). The tartness of the cherries balances the apples' crisp sweetness. Sprinkle over 1.5 cups Granulated Sugar, 0.5 cup Light Brown Sugar, 2 tsp Ground Cinnamon, 0.5 tsp Ground Nutmeg, and 0.5 tsp Salt. Toss gently but thoroughly—this ensures every fruit piece gets that perfect spiced coating.
Let the mixture sit for 5 minutes while you prepare the cake batter. This gives the sugars time to begin drawing out the fruit's juices, which will create that luscious sauce at the bottom of your cake. You'll know it's ready when the fruit looks glossy and the sugars have slightly dissolved.
👨🍳 Step 2: Mix the Cake Batter
In a separate bowl, whisk together the 2 cups All-Purpose Flour, 2 tsp Baking Powder, and 0.5 tsp Salt. This dry mixture is your base—keep it ready while you prepare the wet ingredients. In another bowl, beat the 2 whole Large Eggs until smooth, then add the 0.5 cup Unsalted Butter (cold and cubed) and 1 tsp Vanilla Extract. Beat until creamy, about 2 minutes—this ensures the butter incorporates fully for a tender crumb.
Gradually whisk in the 0.75 cup Whole Milk until fully combined. Then, slowly add the dry ingredients to the wet, mixing just until no flour streaks remain. Overmixing develops gluten, which makes the cake tough. Stop as soon as the batter comes together—it should be thick but pourable. The batter should coat the back of a spoon without being gluey.
🥘 Step 3: Assemble and Bake
Pour the fruit mixture into an 8-inch cast iron skillet or oven-safe baking dish. The skillet's heavy material conducts heat evenly, creating that perfect caramelized bottom. Spoon the cake batter over the fruit, spreading it gently with a spatula to cover the fruit completely. You might notice some fruit peeking through—this is normal and adds texture.
Bake at 350°F for 45-50 minutes, until the top is golden brown and a toothpick inserted near the center comes out clean. The cake will look slightly underdone in the center when you take it out—this is intentional. The residual heat will finish cooking it as it sits. Real talk: don't open the oven during baking. Every time you peek, you risk losing heat and causing the cake to sink.
⏰ Step 4: Rest and Serve
Remove the cake from the oven and let it cool for 10 minutes in the pan. This resting period allows the layers to set slightly and prevents the cake from falling apart when you serve it. The fruit will have released its juices, creating a warm, spiced sauce at the bottom—this is the magic of a dump cake.
Slice while still warm for the best experience. The cake should have a tender crumb with pockets of juicy fruit throughout. Serve with a scoop of vanilla ice cream or a dollop of whipped cream to balance the warm, spiced flavors. If you're making this ahead, store it covered at room temperature for up to 2 days, but reheat slices in the oven for 5 minutes at 350°F to revive the fruit's warmth.
Pro Tips For Making Apple Cherry Dump Cake
- CHOP APPLES SMALL: Granny Smiths stay firm when sliced into ¼-inch pieces—any bigger and they’ll turn to mush before the cake sets. I learned this the hard way after serving a batch with uneven chunks that released juice like a leaky faucet.
- PIT CHERRIES FAST: Use a butter knife to split pits lengthwise, then tap them out with your thumb—no fancy tools needed. Skipping this step means biting into a cake with a gritty surprise (yes, I’ve done it).
- BAKE UNTIL GOLDEN: The cake’s done when edges pull away from the pan and the top is deep golden, not just pale brown. My first few batches came out underdone because I trusted the timer over visual cues—now I wait for that caramelized crust.
- DRIZZLE WITH JUICE: Pour the pan’s fruit juices over the cake right after pulling it from the oven. That sticky glaze locks in moisture and adds a natural sweetness—no extra syrup needed. (Your future self will notice the difference.)
Pro cooking tips for perfect results
Perfect Fruit Prep
Uniformly sliced fruit cooks evenly and releases juices beautifully. Use a mandoline slicer for perfect ¼-inch apple slices—it saves time and ensures consistency. For cherries, I recommend Trader Joe's frozen pitted cherries in summer when fresh ones are expensive. Pat them dry before tossing with sugar to prevent a soggy bottom. 🍎
If your apples are extra tart, add 1 tbsp extra sugar to the fruit mixture. The sugar caramelizes during baking, creating that irresistible sauce at the bottom. For a textural twist, fold ½ cup chopped pecans into the cake batter before baking—they add crunch that contrasts the soft fruit.
Batter Consistency
The batter should be thick enough to hold its shape but still pourable. If it's too thick, add 1 tablespoon milk at a time until it reaches the right consistency. I use a hand mixer on low speed when combining wet ingredients to avoid overmixing. The key is stopping as soon as the batter comes together—overmixing develops gluten, which makes the cake dense. 🥄
For extra richness, replace ¼ cup of the milk with heavy cream. This creates a moister crumb that soaks up the fruit juices beautifully. If you're baking at high altitudes, increase the baking powder to 2.5 tsp to help the cake rise properly in the thinner air.
Pan Selection
An 8-inch cast iron skillet creates the perfect caramelized bottom, but any oven-safe dish will work. I avoid glass dishes—they don't conduct heat as well and can cause uneven baking. If using a metal baking dish, choose one with sloped sides to make serving easier. For a rustic look, try a Dutch oven—it creates a deeper, more pronounced sauce at the bottom. 🔥
Grease your pan lightly with butter or oil before adding the fruit mixture. This prevents sticking and makes cleanup effortless. If you're worried about the cake sticking, line the pan with parchment paper cut to fit—just make sure it doesn't overhang the sides, or it might burn.
Baking Secrets
Place your cake in the center rack of your oven for even heat distribution. The middle rack ensures the cake bakes uniformly without browning too quickly on top. If your oven runs hot, reduce the temperature to 340°F and add 5-10 minutes to the baking time. 🌡️
For a golden-brown finish, broil the cake for 1-2 minutes at the end of baking time. Keep a close eye on it—broiling can happen quickly, and you don't want to burn the top. The broiler adds color and a subtle crispness to the cake's surface that regular baking can't match.
Nutrition facts
Frequently asked questions
Can I use canned cherries instead of fresh?
Yes! Drain and rinse 1 (15 oz) can of tart cherries first to remove excess syrup. Pat them dry thoroughly with a paper towel to prevent a soggy cake. You may need to reduce the sugar slightly (1 tbsp less) since canned cherries are often packed in syrup.
Why did my cake sink in the middle?
This usually happens from opening the oven too early or underbaking. The cake should look slightly underdone in the center when done—residual heat finishes cooking it. Also check your baking powder is fresh (test with vinegar) and avoid overmixing the batter. For next time, try broiling for 1-2 minutes at the end to set the top.
How do I adjust for fewer servings?
This recipe makes 8 servings. For 6 servings, reduce apples to 3 medium, cherries to 1 cup, flour to 1.5 cups, and sugar to 1 cup total. Keep all other ingredients the same. Use a 7-inch skillet instead of 8-inch for proper proportions.
Can I make this without eggs?
Yes! Replace the 2 eggs with 2 tbsp ground flaxseed + 6 tbsp water (let sit for 5 minutes to thicken). For a richer texture, use ½ cup unsweetened applesauce instead. The cake will be slightly denser but still delicious. Always reduce baking time by 2-3 minutes when using egg substitutes.
What's the best way to reheat leftovers?
For individual slices, microwave for 20-30 seconds with a splash of milk to restore moisture. For the whole cake, wrap in foil and bake at 325°F for 10 minutes. Never reheat uncovered—it dries out the fruit. The oven method gives the best texture revival.