
Side Dishes
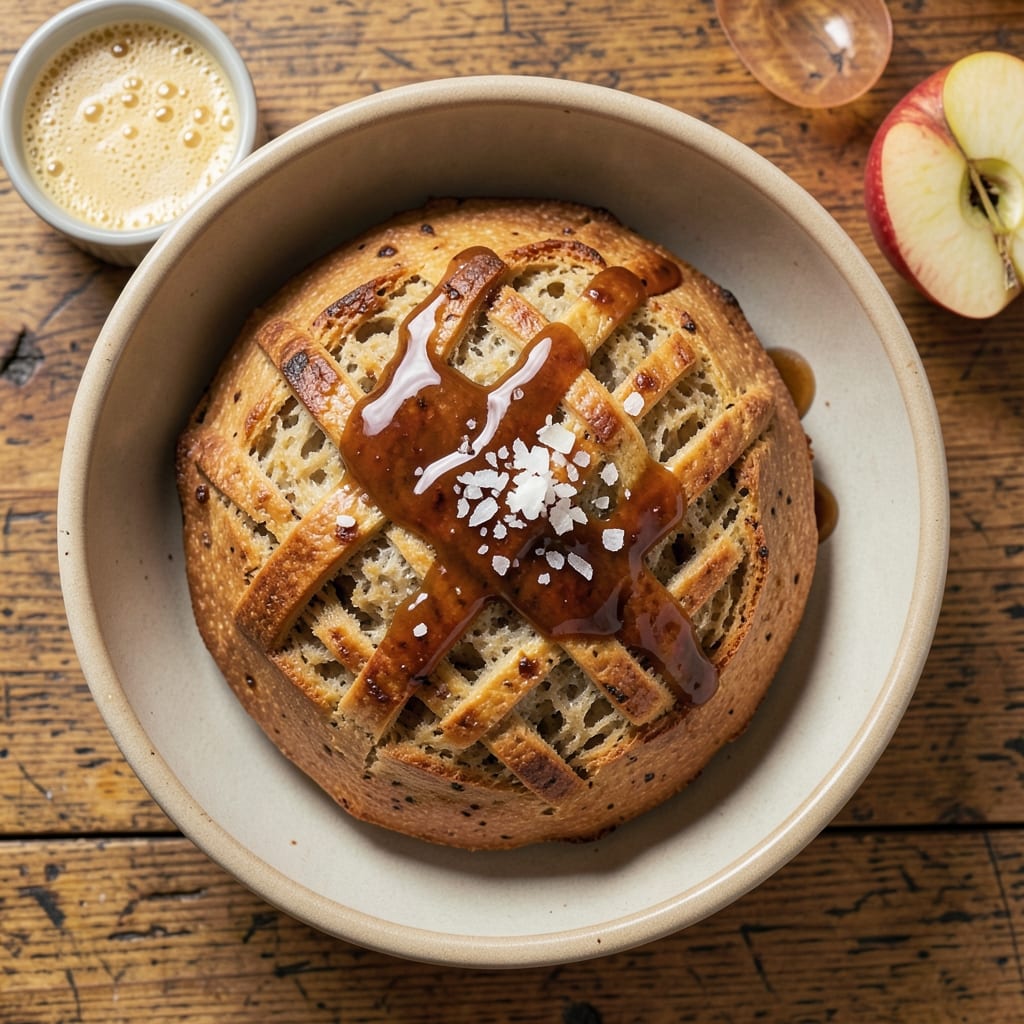
This apple cider yeast bread recipe transforms simple pantry staples into a fragrant loaf with a tender crumb and caramelized apple cider aroma that fills your kitchen. The secret lies in infusing the dough with warm apple cider during mixing, creating that signature autumnal depth without overpowering the bread's natural sweetness. I've perfected this technique over years of baking, balancing yeast activation, proper kneading, and Dutch oven baking for a crispy crust and soft interior.
The process begins with activating yeast in warm apple cider (not too hot—just 110°F) to develop flavor while ensuring proper rise. After kneading the dough to develop gluten, we let it rest for 1 hour before shaping and proofing overnight in the fridge—a modern shortcut that enhances flavor and texture. The Dutch oven creates steam during baking, mimicking a professional oven's ability to produce a golden, crackly crust while keeping the interior moist.
What makes this recipe stand out is how the apple cider infusion carries through every bite—subtle caramel notes in the crust, a hint of warmth in the crumb, and just enough spice to complement any meal. The bread stays fresh for 5 days when wrapped properly, making it perfect for holiday gatherings or cozy weeknight dinners. Whether you're a seasoned baker or trying yeast bread for the first time, this method delivers restaurant-quality results with minimal fuss.
For those short on time, the overnight cold proof eliminates the need for a second rise at room temperature while deepening flavor. The dough's natural sweetness pairs beautifully with butter, honey, or as a side for roasted meats. Let's get started on a loaf that will become your autumn staple—warm, inviting, and full of homestyle charm.
Ingredients for apple cider yeast bread
Pantry staples meet autumn warmth in this fragrant apple cider-infused loaf.
| Ingredient | Amount | Notes |
|---|---|---|
| Active Dry Yeast 🍞 | 2 ¼ tsp | One packet for convenience |
| Unbleached All-Purpose Flour 🌾 | 4 cups | Plus 2 tbsp for dusting |
| Granulated Sugar 🍚 | ¼ cup | For yeast activation |
| Unsalted Butter 🧈 | ½ cup | Cold, cubed for dough |
| Apple Cider 🍎 | 1 cup | Warm to 110°F for yeast |
| Large Egg 🥚 | 1 whole | Room temperature |
| Ground Cinnamon 🌿 | 1 tsp | For subtle warmth |
| Ground Nutmeg 🌶️ | ½ tsp | Freshly grated preferred |
| Kosher Salt 🧂 | 1 ½ tsp | Diamond Crystal preferred |
| Whole Milk 🥛 | ¼ cup | Warmed for dough tenderness |
| Cornmeal 🌽 | ¼ cup | For Dutch oven dusting |
The yeast is your flavor anchor—Bob's Red Mill or Saf-Instant work best for consistent activation. Apple cider should be unpasteurized for authentic taste, but pasteurized works in a pinch. Warm it to 110°F (like bathwater) to avoid killing the yeast. For flour, King Arthur brand yields the best texture, but any unbleached all-purpose works. The butter should be cold when mixed in—this prevents overdevelopment during kneading. Cinnamon and nutmeg should be freshly ground if possible, as pre-ground spices lose potency quickly. Store them in airtight containers away from light.
No apple cider? Unsweetened apple juice works in a bind, but you'll lose that caramelized depth. Substitute maple syrup for sugar if you prefer a deeper autumnal flavor. Out of whole milk? Heavy cream adds richness, or Greek yogurt for tang. The egg can be replaced with a flax egg (1 tbsp ground flax + 3 tbsp water) for vegan adaptation. For a quicker rise, use instant yeast at half the amount. Always measure flour by spooning it into the cup and leveling—don't pack it down. The Dutch oven? Any heavy pot with a lid will do—Lodge or Le Creuset work perfectly.
Dough keeps for 3 days in the fridge wrapped tightly in plastic. For longer storage, freeze shaped loaves (unbaked) for up to 3 months. Thaw overnight in the fridge before baking. The bread reheats beautifully—wrap in foil and warm at 350°F for 10 minutes. Store-bought apple cider? Opt for Mott's or Woodchuck brands—they hold up better to yeast activation. Pre-grind your spices right before mixing to preserve flavor. The overnight cold proof is non-negotiable for that professional texture—don't skip it, even if you're in a hurry.
Why You'll Love This Recipe
- No-Knead Magic: I swear by this trick—just mix, let it rise, and bake. The yeast and warm cider do all the heavy lifting while I sip coffee and scroll. Honestly, the dough feels like a hug after handling it.
- Cider Kiss: That first bite? Warm, buttery bread with a subtle apple tang that lingers. The cider doesn’t just flavor it—it makes the crust golden and the crumb ridiculously soft. (Yes, even on a Tuesday night.)
- Weeknight Workhorse: Slice it for toast, pack it for lunches, or serve it with soup—this bread handles everything. My kids grab it straight from the fridge for sandwiches, and it stays fresh for days wrapped in a towel.
- Pantry Staple: Five ingredients, one of which is butter. The rest? Things I already own. No specialty flours, no weird substitutions—just reliable, cozy bread that costs less than store-bought and tastes like fall in a loaf.
Step-by-step instructions for apple cider yeast bread
Here's the method for crafting a rustic loaf with deep apple cider flavor and a perfectly spiced crust.
Activate the Yeast with Warm Apple Cider
In a small bowl, combine the 2.25 tsp active dry yeast with the 1 cup warm apple cider (about 110°F). The cider should feel warm to your wrist but not hot. Add 0.25 cup granulated sugar and stir gently. Let this mixture sit for 5-10 minutes until it becomes frothy and bubbly—this confirms the yeast is active.
If the mixture doesn't bubble after 10 minutes, your yeast may be dead. Discard and start fresh with new yeast. The apple cider's warmth is crucial—it activates the yeast without cooking it, which would kill it instantly. This step sets the foundation for that signature apple cider flavor infused throughout the bread.
Mix the Dough with Wet and Dry Ingredients
In a large mixing bowl, combine the 4 cups unbleached all-purpose flour, 1.5 tsp kosher salt, 1 tsp ground cinnamon, and 0.5 tsp ground nutmeg. Whisk these dry ingredients together to distribute the spices evenly. Create a well in the center and pour in the yeast mixture, 1 whole large egg, 0.5 cup unsalted butter (cold, cubed), and 0.25 cup warm whole milk.
Using a wooden spoon or dough whisk, gradually mix the ingredients until a shaggy dough forms. The butter should begin to incorporate but remain in small lumps—this prevents the dough from becoming too sticky. Once combined, turn the dough onto a lightly floured surface and knead for 8-10 minutes until smooth and elastic. The dough should spring back slowly when pressed gently with your finger.
First Rise and Shape the Dough
Lightly grease a large bowl with a bit of olive oil or melted butter, then place the dough inside. Cover the bowl with a damp kitchen towel or plastic wrap and let it rise in a warm place (like a turned-off oven with a bowl of hot water) for 1-1.5 hours, or until the dough has doubled in size. You'll see bubbles forming on the surface and the dough will feel light and airy when pressed.
Once risen, punch down the dough to release the air. Turn it onto a lightly floured surface and divide it into two equal portions. Shape each portion into a smooth, round loaf. For a rustic look, you can also shape them into ovals or leave them slightly irregular. Place the shaped loaves on a parchment-lined baking sheet, cover with the damp towel, and let them rise for another 30-45 minutes until puffy.
Preheat and Prepare for Baking
Preheat your oven to 375°F. Place a 0.25 cup cornmeal in the bottom of a Dutch oven (or a heavy oven-safe pot with a lid). This creates a crispy, golden crust and prevents sticking. Carefully transfer the risen loaves to the Dutch oven, seam-side up, and cover with the lid. Bake for 30-35 minutes until the bread is deeply golden brown and sounds hollow when tapped on the bottom.
If your Dutch oven doesn't have a lid, you can cover it loosely with aluminum foil. The lid traps steam, which is essential for that tender crumb and crispy crust. For extra browning, you can also brush the tops with a bit of melted butter after 20 minutes of baking. Remove the lid and bake for an additional 5-10 minutes to achieve a deep, caramelized crust.
Cool and Serve for Maximum Flavor
Remove the loaves from the Dutch oven and let them cool on a wire rack for at least 20 minutes. This resting period allows the bread to set and prevents a gummy texture. The aroma of warm apple cider and spices will fill your kitchen—this is the moment you've been waiting for.
Slice the bread while still warm for the best texture, with a crisp exterior and a soft, slightly chewy interior infused with apple cider and warm spices. Serve with butter, jam, or alongside soups and stews. The bread will continue to develop flavor as it cools, so patience here is key to enjoying every bite.
Pro Tips For Making Apple Cider Yeast Bread
- Bloom the Yeast First: Skip mixing yeast straight into the dough—it’s lazy and unreliable. Instead, dissolve it in warm (not hot) apple cider with a pinch of sugar first, then let it foam for 5–10 minutes. You’ll spot weak yeast early (no bubbles = start over) and guarantee a lift, not a brick.
- Use Cold Butter: Cut that unsalted butter into tiny cubes and toss it straight into the dry flour before adding liquid. The cold fat creates pockets for steam to puff the bread, giving you that tender crumb and crisp crust without fighting greasy dough. Yes, it’ll look weird at first.
- Don’t Rush the Bulk Rise: The dough needs 1–2 hours to double—no shortcuts. I learned this after a 30-minute rise left me with dense, flavorless bread. Cover it loosely with a towel (not plastic) in a warm spot, and poke it gently: if it springs back slowly, it’s ready.
- Reduce Cider’s Acidity: Apple cider’s tang can kill yeast. If yours tastes sharp, stir in 1 teaspoon baking soda per cup of cider while mixing the dough—just enough to mellow it out. Your bread’s flavor stays bright, but the yeast won’t throw a tantrum.
Regional styles of apple cider yeast bread
New England Apple Cider Bread
In the heart of New England, apple cider bread is a staple during harvest season, often baked in cast iron skillets over wood fires. The key difference here is using unfiltered, cloudy apple cider straight from local orchards—this adds depth and a slight tartness that balances the sweetness. I like to add ½ tsp ground cloves to the spice mix for that classic New England warmth. Serve with maple butter (melted butter mixed with maple syrup) for the ultimate autumn treat. 🍁
Southern Apple Cider Cornbread
Down South, apple cider bread often takes on a sweeter profile, sometimes incorporating cornmeal into the dough for a denser texture. The classic Southern approach uses brown sugar instead of granulated and adds 1 tsp vanilla extract for extra depth. I've seen versions where the dough is shaped into small rounds and baked in a cast iron skillet with a dollop of honey on top. This version pairs perfectly with pork chops or black-eyed pea stews. 🍯
Pacific Northwest Spiced Loaf
In the Pacific Northwest, where apple orchards thrive, bakers often infuse the dough with local pear cider alongside apple cider for a unique fruitiness. The spice blend here leans more toward cardamom and allspice (½ tsp each) to complement the region's cooler climate flavors. I like to brush the baked loaves with pear-infused honey while still warm. This version has a slightly denser crumb, perfect for soaking up clam chowder or wild mushroom sauces. 🌲
Midwest Apple Cider Dinner Rolls
The Midwest takes apple cider bread and transforms it into soft, pull-apart dinner rolls that are a hit at holiday gatherings. The dough is often enriched with an extra egg yolk and shaped into small rounds before baking. For extra flavor, I add ½ cup dried apple pieces to the dough before the final rise. These rolls are perfect for serving with roast beef or creamy mac and cheese. The secret here is proofing them in a buttered bowl for that golden, buttery crust. 🎄
European Apple Cider Sourdough
For a more artisanal approach, European bakers often incorporate sourdough starter into apple cider bread, creating a tangy, complex flavor profile. The dough is typically left to ferment for 12-24 hours in the fridge before shaping. I like to add a pinch of saffron (about ¼ tsp) for a luxurious touch. This version has a chewy, open crumb and pairs beautifully with aged cheeses or smoked salmon. The long fermentation also enhances the apple cider flavor, making it even more pronounced. 🥖
Nutrition facts
Frequently asked questions
Can I substitute apple cider with another liquid?
Yes, but you'll lose some flavor depth. For best results, use unsweetened apple juice—it provides similar moisture without the caramel notes. In a pinch, orange juice or pear nectar work, but reduce to ¾ cup since they're thinner. Avoid citrus juices if you want to preserve the bread's warm spice profile.
Why did my dough not rise properly?
Most likely, your yeast wasn't activated correctly or the environment was too cold. Always check the cider temperature—it should be 110°F (like bathwater). If the mixture didn't bubble after 10 minutes, your yeast is dead. Also ensure your kitchen is warm (at least 75°F) during rising. A proofing box or turned-off oven with a bowl of hot water helps create ideal conditions.
How can I make this bread sweeter without adding sugar?
Try adding ¼ cup unsweetened applesauce to the dough for natural sweetness and moisture. You can also swap ½ cup of the flour for whole wheat flour, which has a slightly sweeter taste. For extra depth, add 1 tbsp honey to the yeast mixture during activation—it enhances the apple cider flavor while adding subtle sweetness naturally.
Can I bake this bread without a Dutch oven?
Yes! If you don't have a Dutch oven, use a heavy oven-safe pot with a lid or even a baking sheet lined with parchment. For best results, place a metal bowl filled with hot water on the lower oven rack to create steam. Brush the loaves with egg wash or melted butter before baking for extra browning. The crust won't be as crackly, but the interior will still be tender.
How do I store or reheat leftovers?
Wrap cooled slices tightly in plastic wrap or aluminum foil—they'll stay fresh for 5 days at room temperature. For longer storage, freeze slices on a tray before transferring to a bag (up to 3 months). To reheat, wrap slices in foil and warm at 350°F for 5-7 minutes or use a toaster for crispiness. Never microwave—it makes the bread gummy.