
Desserts
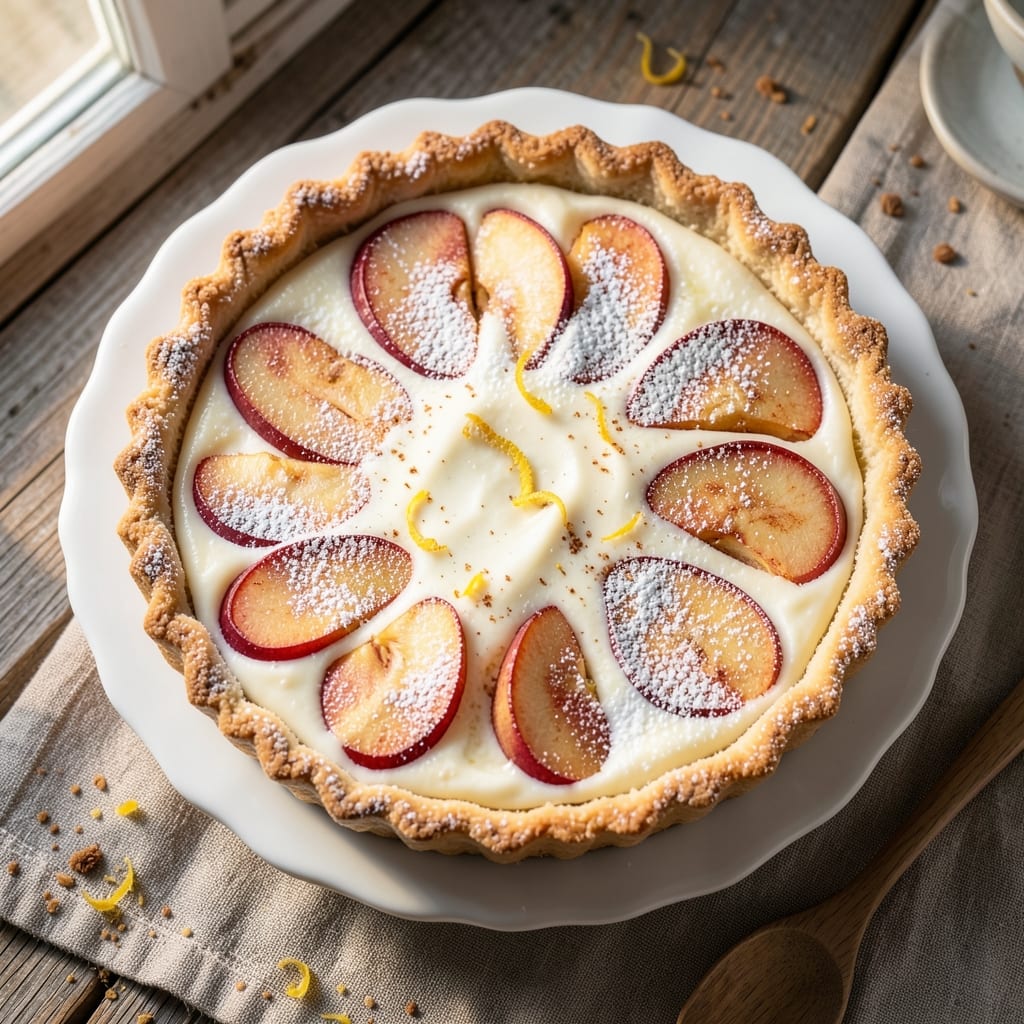
This apple cream tart recipe delivers the perfect balance of crispy pastry, velvety vanilla custard, and caramelized apples that taste like autumn in every bite. The secret lies in baking the tart shell just enough to create a sturdy base, then layering it with a spiced apple filling that softens into a luscious topping. I've perfected this recipe over years of baking, ensuring the custard stays silky and the apples retain their natural sweetness without turning mushy.
The process is straightforward but requires patience—especially when baking the custard to achieve that signature creamy texture. You'll start with a classic pie crust, then fill it with a mixture of apples, sugar, and spices that caramelize beautifully in the oven. The custard layer, made with vanilla bean and egg yolks, adds richness that ties everything together. This isn't just dessert; it's a showstopper that will have everyone asking for seconds.
What makes this recipe stand out is the harmony of textures: the flaky crust, the tender apples, and the smooth custard create a dessert that's both elegant and comforting. The caramelized apples add depth, while the vanilla custard provides a cool contrast that balances the warmth of the filling. Whether you're baking for a special occasion or simply craving something indulgent, this tart delivers restaurant-quality results at home.
For those with dietary preferences, you can easily adapt this recipe with a gluten-free crust or a vegan custard made with coconut milk. The key is maintaining the balance of flavors and textures, no matter the variation. Once you try this apple cream tart, you'll understand why it's a classic that never goes out of style.
Ingredients for apple cream tart
Classic pastry meets autumn spice—just 14 ingredients for showstopping dessert.
| Ingredient | Amount | Notes |
|---|---|---|
| All-Purpose Flour 🌾 | 2 ½ cups | For sturdy tart crust |
| Unsalted Butter 🧈 | 1 cup | Cold, cubed for pastry |
| Granulated Sugar 🍚 | ½ cup | Plus 2 tbsp for filling |
| Large Eggs 🥚 | 1 whole | For crust binding |
| Ice Water 💧 | ⅓ cup | As needed for dough |
| Medium Apples 🍎 | 4 whole | Granny Smith or Honeycrisp |
| Brown Sugar 🍚 | ½ cup | Packed for caramelization |
| Ground Cinnamon 🌿 | 1 tsp | Plus extra for garnish |
| Ground Nutmeg 🌿 | ¼ tsp | Freshly grated preferred |
| Vanilla Extract 🍯 | 1 tbsp | Pure, high-quality extract |
| Large Egg Yolks 🥚 | 4 whole | For custard richness |
| Heavy Cream 🥛 | 1 ½ cups | Full-fat for creaminess |
| Cornstarch 🌾 | 2 tbsp | For custard thickening |
| Salt 🧂 | ½ tsp | Fine sea salt preferred |
The apples are non-negotiable here. Granny Smith or Honeycrisp hold their shape best—avoid anything too soft like Red Delicious. Most grocery stores carry these varieties, but Trader Joe's or Whole Foods often have pre-peeled and cored apple slices if you're short on time. Look for firm, unblemished fruit; those little brown spots mean the apples are past their prime. For the crust, King Arthur flour works best if you want extra flakiness, but regular all-purpose flour is fine. Just don't skip the cold butter—it's what gives that perfect flaky texture.
No Granny Smith? McIntosh or Braeburn work in a pinch, but they'll break down faster. Running low on vanilla extract? Vanilla bean paste at half the amount gives you those little specks. The custard can be made ahead—just reheat gently before assembling. For a shortcut crust, pre-made pie crust from the freezer aisle saves time (just blind-bake it first). The spices? If you've got a spice grinder, fresh nutmeg makes all the difference, but ground works too. No cornstarch? Arrowroot powder at the same amount thickens just as well.
Apples keep 1 week in the fridge, but use them within 3 days of peeling if prepped ahead. The custard mixture can be refrigerated for 2 days before baking. Once assembled, this tart stays fresh for 3 days covered at room temperature or 1 week refrigerated. For make-ahead magic, bake the crust and filling, then freeze the unbaked custard layer. Thaw overnight before baking—it reheats beautifully.
Why You'll Love This Recipe
- No-Fuss Dough: I swear by this cold butter method—just mix, chill, roll. The crust comes together faster than my morning coffee, and the flaky layers? Chef’s kiss. No food processor, no stress.
- Caramelized Apple Magic: That sugar-butter-apple combo? It’s like autumn in a bite. The apples soften just enough to melt in your mouth while keeping a hint of bite—no mushy nonsense here.
- Weeknight Hero: Between us, this is my go-to dessert when I’ve had a long day. The filling’s ready in 10 minutes, the crust chills while I do dishes, and it always disappears.
- Budget-Friendly Luxury: Five ingredients, zero specialty items. The eggs and butter make it feel fancy, but the flour and sugar keep it affordable. Plus, leftovers? They’re always gone by breakfast.
Step-by-step instructions for apple cream tart
Here's how to create a showstopping tart with a buttery crust, caramelized apples, and velvety vanilla cream.
Prepare the Tart Crust
In a large bowl, combine the 2.5 cups all-purpose flour, 0.5 tsp salt, and 0.5 cup granulated sugar. Cut in the 1 cup cold cubed unsalted butter using a pastry cutter or your fingers until the mixture resembles coarse crumbs with pea-sized butter pieces remaining.
Add the 1 whole large egg and mix just until the dough comes together. Sprinkle in 0.33 cup ice water, 1 tablespoon at a time, mixing gently with a fork until the dough holds together when pressed. Divide the dough in half and flatten each piece into a disk. Wrap in plastic wrap and chill for at least 1 hour (or up to 2 days).
Assemble and Bake the Crust
Preheat your oven to 375°F. Roll out one chilled dough disk on a floured surface to fit a 9-inch tart pan with removable bottom. Press the dough gently into the pan, forming a 1-inch border. Trim and crimp the edges with a fork. Blind bake the crust by lining it with parchment paper, filling with pie weights or dried beans, and baking for 15 minutes. Remove the weights and bake for 5-7 minutes more until the edges are lightly golden.
Here's the thing—don't skip the blind baking. It prevents a soggy bottom when you add the filling later. The crust should be set but not browned yet.
Caramelize the Apple Filling
While the crust bakes, peel, core, and slice the 4 medium apples into ¼-inch thick slices. In a large skillet, melt 1 tablespoon unsalted butter over medium heat. Add the apples in a single layer and cook for 3-4 minutes until they begin to soften. Sprinkle with 0.5 cup packed brown sugar, 1 tsp ground cinnamon, and 0.25 tsp ground nutmeg. Cook for another 5-6 minutes, stirring occasionally, until the apples release their juices and begin to caramelize.
Once the apples are tender and the juices have thickened slightly, remove from heat and stir in 1 tablespoon vanilla extract. Let the filling cool for 10 minutes before transferring it to the pre-baked crust. The warm filling will help set the custard layer perfectly.
Make the Vanilla Cream Filling
In a medium saucepan, whisk together the 4 whole large egg yolks, 1.5 cups heavy cream, 2 tablespoons cornstarch, and 0.25 cup granulated sugar. Cook over medium-low heat, stirring constantly with a wooden spoon, until the mixture thickens enough to coat the back of the spoon (about 5-7 minutes). It should reach 170°F on an instant-read thermometer.
Immediately pour the custard over the apple filling in the tart shell. Smooth the top with a spatula. Here's where it gets fun—sprinkle the remaining 2 tablespoons granulated sugar over the custard for a beautiful caramelized crust. Bake at 350°F for 25-30 minutes until the custard is set and the top is golden.
Chill and Serve
Let the tart cool completely at room temperature, then refrigerate for at least 4 hours (or overnight). This chilling time is crucial—it allows the custard to fully set and develop its rich texture. When ready to serve, run a knife around the edge of the tart to loosen it from the pan.
Slice into 6 equal wedges for serving. Each bite should deliver a perfect balance of crisp crust, tender caramelized apples, and silky vanilla cream. For extra flair, dust with a little more ground cinnamon or garnish with fresh mint leaves. Enjoy your homemade masterpiece!
Pro Tips For Making Apple Cream Tart
- Chill the Dough Longer: I learned this the hard way—skipping the extra 30 minutes in the fridge makes the crust tougher and more prone to shrinking. For apple cream tarts, where the filling is delicate, a properly chilled dough holds its shape better when baking.
- Use Cold Butter: Cut that butter into tiny cubes and toss it with the flour before adding ice water. Cold butter creates flaky layers, and tiny cubes melt more evenly—no greasy surprises when rolling. (Yes, even if you're impatient like me.)
- Don’t Overmix the Filling: The custard for this tart is forgiving, but beating the eggs and sugar too hard introduces air, which can make the filling grainy. Whisk just until combined—about 2 minutes max—and stop before it looks like meringue.
- Prevent Cracking with a Water Bath: Place your tart pan in a larger baking dish before adding the custard, then fill the outer dish with hot water halfway up the tart. The steam keeps the top smooth and prevents those unsightly cracks that ruin the presentation. (Your future self will thank you.)
Common mistakes when making this recipe
Over-Baking the Crust
I’ve seen many bakers overdo it with the crust, turning it golden brown before the filling even goes in. The key is a lightly baked crust—just until it’s set but still pale. Over-baking makes the crust tough and can cause it to shrink away from the filling, leaving gaps. Aim for 15-22 minutes total in the oven (including blind baking), and check at 12 minutes to avoid overcooking. A properly baked crust should hold its shape but still feel tender to the touch. 🌟
Skipping the Blind Bake
This is a classic rookie mistake that leads to a soggy bottom. Blind baking the crust ensures it’s sturdy enough to hold the weight of the filling and custard without collapsing. If you skip this step, the crust will absorb the juices from the apples and custard, turning mushy. Always line the crust with parchment paper and fill it with pie weights or dried beans before baking. Remove the weights after 15 minutes and bake for an additional 5-7 minutes to set the edges. ⏰
Undercooking the Custard
The custard is the heart of this tart, and undercooking it will leave you with a runny, unappetizing center. The custard needs to reach 170°F on an instant-read thermometer, which takes about 5-7 minutes of constant stirring over medium-low heat. If it’s not thick enough, the tart will have a watery layer instead of that silky, velvety texture we all love. Once it coats the back of a spoon, it’s ready to pour. 💛
Using the Wrong Apples
Not all apples are created equal, and using the wrong variety can ruin the texture of your filling. Soft apples like Red Delicious will turn to mush, while tart ones like Granny Smith or Honeycrisp hold their shape beautifully. If you’re in a pinch, McIntosh or Braeburn work, but they’ll break down faster. Always peel, core, and slice apples just before cooking to prevent browning and maintain freshness. 🍎
Adding Cold Filling to a Hot Crust
This is a recipe for disaster—adding cold apple filling to a freshly baked crust can cause the filling to sit unevenly and not caramelize properly. Let your apple filling cool for 10 minutes after cooking so it’s warm but not scorching. This ensures even distribution and helps the custard set smoothly over the filling. The warm filling also prevents the crust from absorbing too much moisture, keeping it crisp. 🔥
Overmixing the Dough
When making the tart crust, it’s easy to overmix the dough, which leads to a tough, dense result instead of the flaky layers we want. Mix the dough just until it comes together—no more than 10-12 strokes with a fork. Overmixing develops the gluten, making the crust chewy rather than tender. Keep the butter cold and cut it into the flour quickly for that perfect flaky texture. 🧈
Nutrition facts
Frequently asked questions
Can I make this tart ahead of time?
The crust can be baked and stored at room temperature for 2 days or frozen for 1 month. The custard mixture can be made 2 days ahead and refrigerated. Assemble the tart just before baking, then chill for 4 hours before serving. This makes it perfect for holiday gatherings or special occasions.
How do I prevent the custard from curdling?
Curdling happens when the custard gets too hot too quickly. Always cook over medium-low heat and stir constantly with a wooden spoon. Remove from heat as soon as it reaches 170°F and coats the back of a spoon. Never let it boil, and avoid adding cold ingredients to hot custard.
What's the best way to store leftovers?
Cover tightly with plastic wrap and refrigerate for up to 3 days. For longer storage, slice and freeze individual portions in airtight containers for 1 month. Thaw overnight in the fridge before serving. The custard may firm up but will soften at room temperature.
Can I substitute the vanilla custard?
Yes! For a lighter texture, try a pastry cream made with milk instead of heavy cream. For a vegan option, use coconut milk and cornstarch, but reduce sugar by 2 tablespoons as coconut milk is sweeter. The custard should still reach 170°F for proper setting.
Why did my crust shrink during baking?
This usually happens when the dough isn't chilled long enough or the butter melts too quickly. Always keep the dough cold and use cold butter. Press the dough gently into the pan and don't overwork it. If it shrinks slightly, just add more crust pieces on top before baking to cover any gaps.