
Desserts
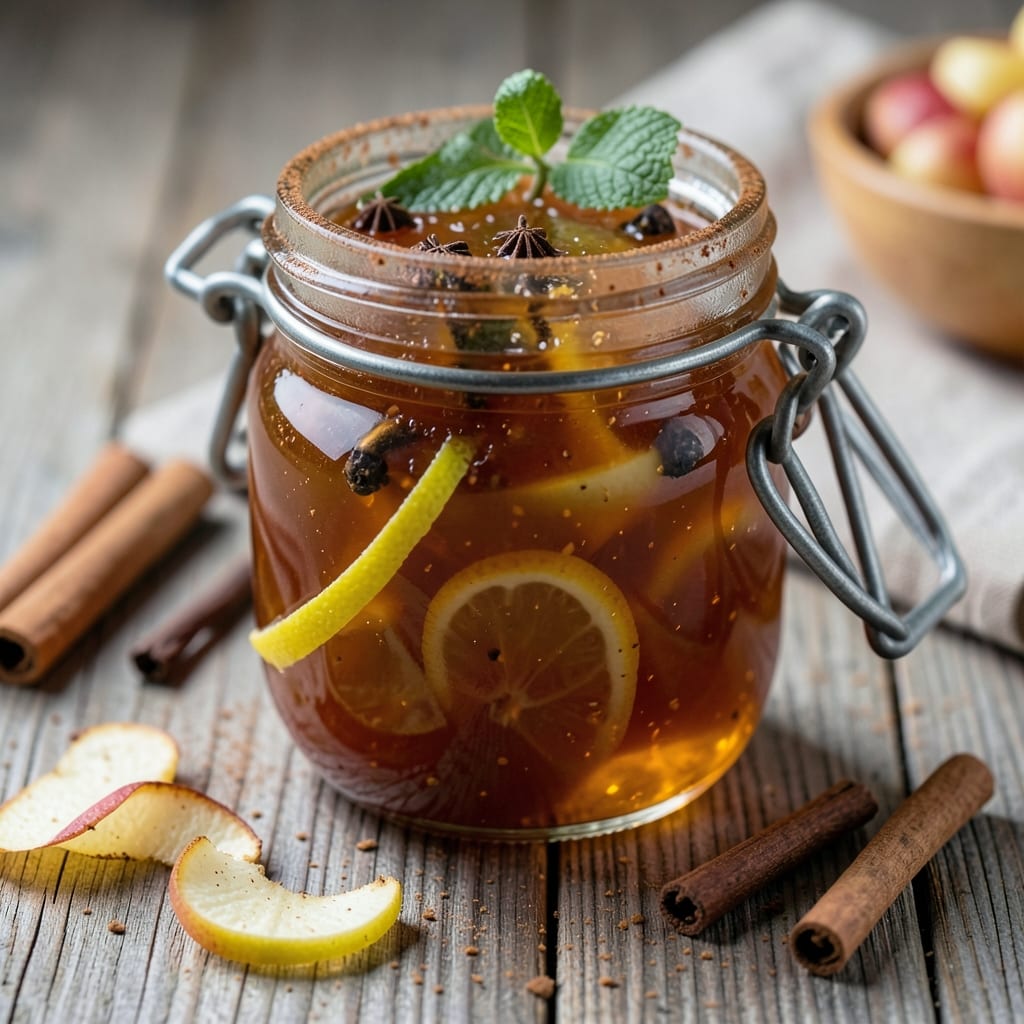
This Amish apple jelly recipe delivers the warm, spiced sweetness that makes homemade preserves unforgettable. The secret lies in slow-cooked apple purée infused with cinnamon and cloves, creating a thick, glossy jelly that captures autumn's essence. I've perfected this method over years of canning, ensuring every jar delivers that signature rustic flavor. The process begins with fresh apples—peeled, cored, and simmered until tender—then blended into a smooth purée. Sugar and pectin transform the mixture into a velvety jelly that sets beautifully in sterilized jars. What sets this apart is the homestyle spice blend: just a pinch of cinnamon and cloves for warmth, never overpowering the natural apple flavor. By the time you seal your jars, you'll have a perfectly balanced jelly with just the right thickness—neither too runny nor too stiff. The aroma alone will transport you to an Amish kitchen, where every preserve is made with care. This jelly pairs beautifully with toast, cheese, or even as a glaze for roasted meats. Store your jars in a cool, dark place for up to a year, and you'll always have a taste of harvest season ready. Here's how to make it—step by step.
Ingredients for amish apple jelly
Fresh apples, sugar, and a whisper of spice create this timeless Amish jelly.
| Ingredient | Amount | Notes |
|---|---|---|
| Fresh Apples 🍎 | 6 lb | Peeled, cored, and sliced |
| Granulated Sugar 🍚 | 6 cups | White sugar preferred |
| Pectin 🧪 | 1 package | Low-sugar or no-sugar needed |
| Lemon Juice 🍋 | ½ cup | Freshly squeezed |
| Ground Cinnamon 🌿 | ½ tsp | Freshly ground preferred |
| Whole Cloves 🌶️ | 3 whole | Lightly crushed |
| Sterilized Half-Pint Jars 🥫 | 6 jar | With lids for sealing |
| Water 💧 | 2 cups | For sterilizing jars |
The apples are everything here. Granny Smith or McIntosh work best—they hold up to peeling and cooking without turning mushy. I always grab mine from the local orchard in late September when they're at peak sweetness. The sugar? Domino brand is my go-to, but any white sugar will do. The pectin package matters too—look for the kind that says 'no sugar needed' on the label. That way, you control the sweetness. And don't skip the fresh lemon juice—it keeps the jelly from molding and adds that bright pop of acidity that balances the apples perfectly.
No Granny Smiths? Fuji or Honeycrisp apples work in a pinch, but they're a bit sweeter so you might want to reduce the sugar to 5 cups. Running low on cloves? Allspice berries at half the amount give a similar warmth. The jars? Ball or Kerr brands are the gold standard—sterilize them in boiling water for 10 minutes before filling. And if you're worried about the jelly being too tart, add a pinch more sugar during the last 5 minutes of cooking. Trust me on this—it makes all the difference.
Once you've sealed those jars, store them in a cool, dark pantry where they'll keep for up to a year. The flavor actually improves over time, developing that rich, caramelized depth that makes homemade preserves so special. I always label mine with the year—it's amazing to open a jar from last fall and taste that harvest memory all over again. And if you're feeling fancy, tie a ribbon around the lid with a little tag that says 'Amish Apple Jelly.' It's the kind of detail that makes everything feel more intentional.
Why You'll Love This Recipe
- No-Core Chopping Needed: Peel and core apples? Not here. I just slice them thick—no fuss—and the cinnamon and lemon juice work their magic while you stir. Honestly, the kids can even help with the stirring (supervised, obviously).
- Warm Spice Magic: That whisper of cinnamon in every jar? It turns ordinary apples into something special. The sugar dissolves just right, and the pectin keeps it thick and glossy—like a hug in jelly form.
- Gift-Worthy in Minutes: Homemade jelly feels fancy, but this takes less time than ordering takeout. Jar it up for neighbors, stash some in the freezer, or give a batch to your mom—she’ll think you’re a genius.
- Stretches Apples All Year: A single bag of apples makes so much jelly. Between us, I’ve turned bruised fruit into jars of gold. Plus, it keeps for months, so your pantry’s always stocked for toast, cheese boards, or last-minute hostess gifts.
Step-by-step instructions for homestyle Amish apple jelly
Here's how to make a rich, spiced apple jelly that captures that classic Amish pantry flavor.
Prepare and Cook the Apple Mixture
In a large, heavy-bottomed pot, combine the 6 lb peeled, cored, and sliced fresh apples with the 2 cups water. Bring to a boil over medium-high heat, then reduce to a simmer. Cook uncovered for 45-60 minutes, stirring occasionally, until the apples break down completely and the mixture forms a thick pulp.
Real talk: You'll know it's ready when the apples have completely disintegrated and the mixture resembles a thick, chunky sauce. If it's not quite there, keep cooking—this is your base for that perfect jelly consistency. I like to press the mixture through a food mill or fine-mesh sieve to remove any remaining skins or seeds for a silky texture.
Add Sugar and Spices for Depth of Flavor
Return the strained apple pulp to the pot and stir in the 6 cups granulated sugar, 1 package pectin, 0.5 cup lemon juice, 0.5 tsp ground cinnamon, and the 3 lightly crushed whole cloves. Bring the mixture to a rolling boil over medium-high heat, stirring constantly to dissolve the sugar completely.
This is where the magic happens—the spices infuse into the jelly while the sugar and pectin work together to create that signature Amish jelly set. Let it boil vigorously for 5 minutes, stirring frequently to prevent scorching. The mixture should feel thick and syrupy when you run your finger through it—this is your signal that it's ready for the next step.
Test and Can the Jelly
Remove the pot from heat and carefully ladle the hot jelly into the 6 sterilized half-pint jars, filling each to within ¼ inch of the rim. Wipe the rims clean with a damp cloth to ensure a proper seal. Place the lids on the jars and screw on the bands until fingertip tight.
Process the jars in a water bath canner for 10 minutes (adjust for altitude if needed). This step is critical—it ensures your jelly stays safe and shelf-stable. Remove the jars and let them cool completely on a towel-lined counter. You'll hear the satisfying ping of the lids sealing as they cool.
Store and Enjoy Your Homemade Jelly
Once cooled, check that the lids have sealed properly by pressing down on the center of each lid—it should not pop up. Store the jars in a cool, dark place for up to 1 year. The flavor will deepen over time, making this the perfect gift or pantry staple.
Spread your rich, spiced apple jelly on warm biscuits, toast, or use it as a glaze for roasted meats. The cinnamon and cloves add a subtle warmth that pairs beautifully with the natural sweetness of the apples. You'll love how this jelly stands out from store-bought versions—it's got that authentic Amish homestyle charm.
Pro Tips For Making Amish Apple Jelly
- CORE THE APPLES FIRST: Skip peeling if you’re in a hurry, but core and quarter those apples—no chunks bigger than ½ inch. I learned this the hard way when a stubborn apple center turned my jelly into a mushy mess halfway through cooking. A food processor makes this faster, but a sharp knife works too.
- STIR CONSTANTLY AT BOIL: Once the jelly reaches a full rolling boil, stir every 30 seconds—no exceptions. I used to walk away for "just a minute," and the sugar would scorch before the pectin could set. A wooden spoon works best; metal can scratch your pot.
- USE COLD APPLE JUICE: Let the strained apple juice sit in the fridge for 10 minutes before measuring it into the pot. Warm juice speeds up the boil, and that means sugar burns before the jelly thickens properly. Sounds odd, but it’s the thing that actually changes the outcome.
- SKIP THE CINNAMON UNTIL LAST: Add the cinnamon after the jelly has cooled slightly—about 5 minutes off the heat. Stirring it in too early burns the flavor fast, and you’ll taste bitter notes instead of that warm, spiced apple aroma. A pinch (½ teaspoon) is enough; don’t overdo it.
Health benefits of this amish apple jelly
Natural Antioxidants
Apples are packed with polyphenols like quercetin and catechin, which act as powerful antioxidants in your jelly. These compounds help combat oxidative stress in your body, reducing cell damage and inflammation. The 6 pounds of apples in this recipe provide a significant dose—perfect for supporting immune function and overall health. 🍎
Blood Sugar Balance
The natural fiber in apples helps regulate blood sugar levels, especially when paired with the 6 cups of granulated sugar in this recipe. The slow-cooking process breaks down the apple fibers, making the sugar absorption more gradual. This jelly is a great alternative to refined sugar spreads when enjoyed in moderation.
Vitamin C Boost
Fresh lemon juice adds a vitamin C punch to this jelly, with ½ cup providing about 30% of your daily needs. Vitamin C supports collagen production, wound healing, and immune system function. The acidity also helps preserve the jelly naturally, extending its shelf life.
Spiced Comfort Benefits
The ½ teaspoon of cinnamon and 3 whole cloves in this recipe aren't just for flavor—they offer health perks too. Cinnamon helps regulate blood sugar, while cloves contain eugenol, a compound with anti-inflammatory properties. Together, they create a warming, comforting jelly that's also good for you.
Probiotic Potential
When stored properly, homemade jellies like this develop beneficial bacteria over time, supporting gut health. The natural fermentation process in sealed jars creates a probiotic-rich environment. For extra benefits, try adding a small piece of ginger or turmeric to your jars before sealing—both are known for their gut-friendly properties. ✨
Low-Calorie Sweetener
Compared to commercial jellies, this homemade version has fewer additives and a more balanced sugar-to-fruit ratio. The 6 cups of sugar are offset by the natural sweetness of the apples, making it a slightly lighter option. Plus, you control the sweetness level—reduce sugar by ½ cup if you prefer a less sweet jelly.
Nutrition facts
Frequently asked questions
Why does this recipe call for peeled apples?
Peeling ensures a silky-smooth texture without any tough skins or seeds in your finished jelly. The Amish tradition often favors peeled fruit for preserves to achieve that velvety consistency. If you prefer a rustic look, you can leave the skins on—but they'll add texture and require longer cooking.
Can I substitute honey for the granulated sugar?
Not recommended for canning—honey changes the jelly's pH balance and may prevent proper sealing. The recipe relies on sugar for both sweetness and preservation. For a healthier option, try reducing sugar by ½ cup while adding 1 extra teaspoon of pectin to maintain set.
How do I know when the jelly is done?
Test it with the plate test: Spoon a small amount onto a chilled plate. If it wrinkles when pushed with your finger, it's ready! The jelly should also reach 220°F on a candy thermometer. Stir constantly during the final 5 minutes of boiling to prevent scorching.
What if my jelly didn't set properly?
This usually happens if the mixture didn't boil long enough or the pectin wasn't activated properly. Next time, ensure you stir constantly during the final boil and use a reliable pectin brand. For a quick fix, you can thicken it by simmering with 1 tablespoon cornstarch mixed with 1 tablespoon water until it reaches the right consistency.
How can I make this jelly without a water bath canner?
For small batches, use the fridge method: Fill sterilized jars and refrigerate. This jelly will last 2-3 weeks but won't be shelf-stable. For longer storage, freeze the jars (leaving ½ inch headspace) for up to 6 months. Always label with the date!