
Desserts
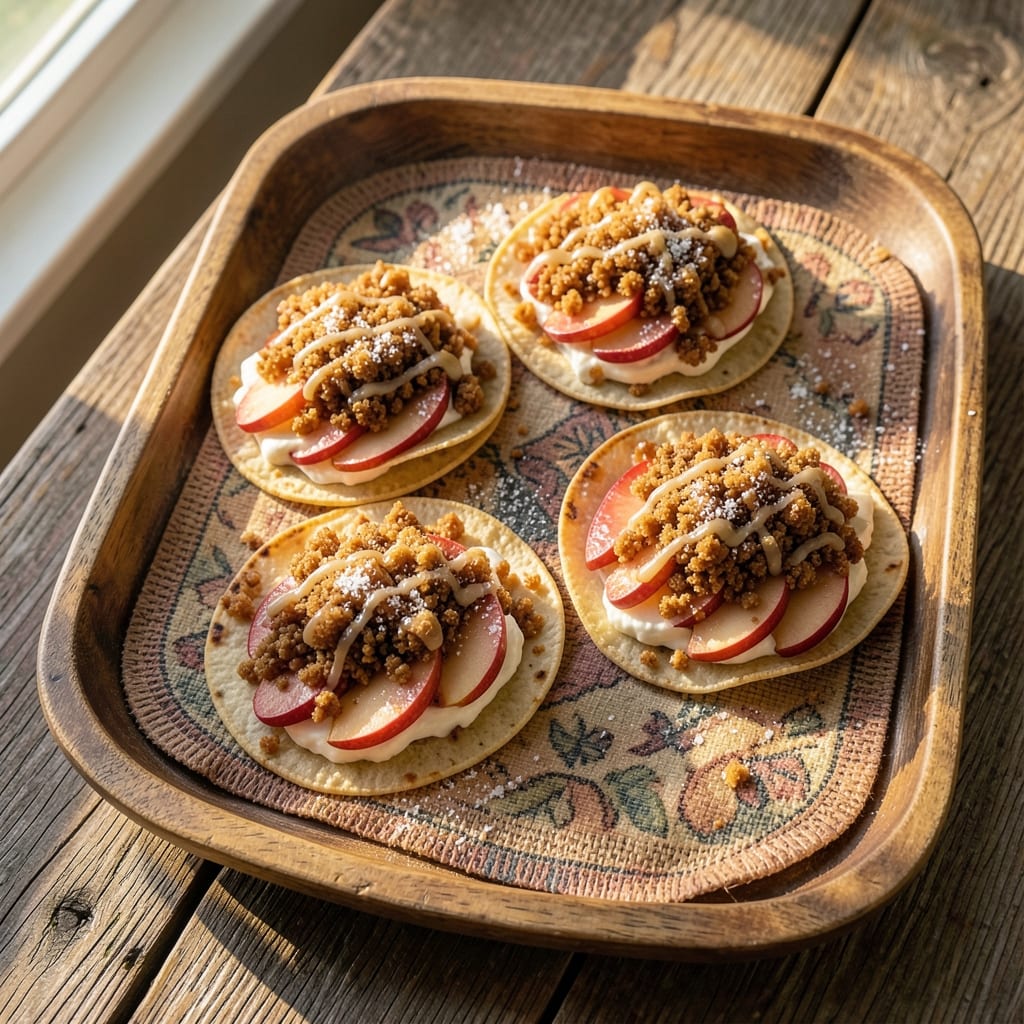
This apple cheesecake tacos recipe transforms dessert into an interactive, bite-sized masterpiece that balances creamy cheesecake with spiced apple compote. The secret lies in a foolproof graham cracker crust that stays crispy while supporting the filling, paired with a tangy cream cheese base that holds up to assembly. I developed this after years of perfecting individual components—each element must work together to deliver that perfect sweet-savory crunch in every bite.
The process begins with baking a rich, no-fuss cheesecake layer that's firm enough to slice cleanly but still melts slightly when warm. Meanwhile, the apple compote caramelizes just enough to develop deep flavor without becoming syrup. What makes these tacos special is the textural contrast: the crispy shell, creamy cheesecake, and tender-spiced apple create a harmony that keeps every bite exciting. This isn't just dessert—it's an experience that turns ordinary gatherings into memorable moments.
By the time you're done assembling, you'll have restaurant-quality tacos that look as impressive as they taste. The presentation matters too—think golden caramel drizzle, whipped cream swirls, and a dusting of cinnamon that ties everything together. These tacos are perfect for parties, date nights, or when you want to impress without spending hours in the kitchen. The best part? Each component can be prepped ahead, so assembly is quick when guests arrive.
Whether you're serving to a crowd or treating yourself to a special dessert, this recipe delivers consistent, crowd-pleasing results every time. The balance of sweet and savory, creamy and crunchy, makes these tacos uniquely satisfying. Let's get started on creating your own dessert masterpiece that will have everyone asking for the recipe.
Ingredients for apple cheesecake tacos
Twelve ingredients crafting restaurant-quality bites that balance creamy, spiced, and crunchy perfection.
| Ingredient | Amount | Notes |
|---|---|---|
| Graham Cracker Crumbs 🍪 | 2 cups | Fine texture, no large pieces |
| Unsalted Butter 🧈 | ½ cup | Melted, full-fat preferred |
| Red Apples 🍎 | 4 medium | Honeycrisp or Fuji, peeled |
| Granulated Sugar 🍚 | ¾ cup | White or brown sugar |
| Cream Cheese 🧀 | 16 oz | Full-fat, room temperature |
| Vanilla Extract 🌿 | 1 tbsp | Pure, high-quality preferred |
| Cinnamon 🌶️ | 1 tsp | Ground, for spice blend |
| Ground Ginger 🌿 | ½ tsp | Freshly ground preferred |
| Lemon Juice 🍋 | 1 tbsp | Freshly squeezed |
| Heavy Whipping Cream 🥛 | 1 cup | Cold, full-fat for whipping |
| Powdered Sugar 🍚 | ¼ cup | For dusting |
| Salted Caramel Sauce 🍯 | ½ cup | Store-bought or homemade |
| Whipped Cream 🥛 | 1 cup | Stable, for garnish |
| Caramel Drizzle 🍯 | ¼ cup | Optional, for presentation |
The apples are non-negotiable—Honeycrisp or Fuji deliver that perfect balance of sweetness and tartness. Grab a bag from Whole Foods or your local market, but avoid those mealy Red Delicious. Peeled and diced into 1/4-inch cubes, they caramelize beautifully. The cream cheese? Philadelphia brand melts smoothly, but any full-fat block works if you grate it yourself. For the graham crackers, Honey Maid or Keebler are my go-tos—they crush into fine crumbs that create that essential crunch. Pro tip: toast the crumbs lightly before mixing with butter for extra flavor depth.
No Honeycrisp apples? Granny Smith adds tartness, or Gala for milder sweetness. Short on caramel sauce? Brown sugar + butter makes a quick substitute—simmer 1/4 cup brown sugar with 2 tbsp butter until glossy. The whipped cream can be store-bought (like Cool Whip) if you're short on time, but homemade with heavy whipping cream + powdered sugar gives that restaurant-quality texture. For the spice blend, Penzeys has pre-mixed apple pie spice, but I always make mine fresh with cinnamon, ginger, and a pinch of nutmeg. The vanilla extract? Nothing but Pure is my splurge brand—it makes all the difference.
Prep ahead like a pro: bake the cheesecake layer and make the apple compote 2 days in advance—they taste even better after flavors meld. Store components separately in airtight containers. The graham cracker crust keeps 3 days at room temperature, while the cheesecake and compote stay fresh for 5 days in the fridge. For parties, assemble tacos just before serving so they stay crisp. The whipped cream and caramel drizzle can be made 1 day ahead—just re-whip the cream before serving. Freeze the cheesecake layer for 2 months if needed, but bring to room temp before slicing.
Why You'll Love This Recipe
- No Baking Required: I swear by this—no oven, no waiting, just a skillet and 15 minutes. The graham crumb base melts into a crispy shell while the apples caramelize right alongside the cream cheese, and honestly? That’s all you need for pure satisfaction.
- Sweet-Salty Magic: The apples get tender but still hold their bite, while the cream cheese adds that velvety richness. Sprinkle in a pinch of cinnamon or even a drizzle of honey, and you’ve got a flavor combo that’s dangerously addictive—like dessert and comfort food had a baby.
- Picnic to Party: These tacos are my go-to for anything from a lazy Sunday brunch to a last-minute potluck. Wrap them in tortillas for handheld fun, or serve them on a platter with a scoop of vanilla ice cream—suddenly, you’re hosting.
- Leftovers That Don’t Suck: Between us, most cheesecake recipes leave you with a sad, soggy mess. Not these. The graham crumb base stays crisp, the apples hold up, and the cream cheese filling? Still creamy after days. Pack them for lunch or reheat for a quick snack—no one will guess they’re from yesterday.
Step-by-step instructions for apple cheesecake tacos
Here's how to assemble these decadent treats with layers of sweet apple filling and creamy cheesecake crumb topping.
Prepare the Cheesecake Crumb Topping
In a mixing bowl, combine the 2 cups graham cracker crumbs with the 16 oz cream cheese and 0.5 cup unsalted butter. Use a hand mixer or your fingers to work the mixture until it forms a thick, crumbly dough. The texture should resemble wet sand that holds together when pressed.
In a separate small bowl, whisk together the 0.75 cup granulated sugar, 1 tbsp vanilla extract, 1 tsp cinnamon, and 0.5 tsp ground ginger. Pour this spice mixture over the crumb dough and mix thoroughly. The aroma should be warm and inviting—this is where all the cozy fall flavors begin. Cover the bowl and refrigerate while you prepare the apple filling.
Cook the Spiced Apple Filling
Peel and core the 4 medium red apples, then slice them into ¼-inch thick rounds. In a large skillet over medium heat, melt the remaining 0.5 cup unsalted butter until foamy. Add the apple slices in a single layer and cook for 5-6 minutes until they begin to soften and release their juices.
Stir in the 0.75 cup granulated sugar and 1 tbsp lemon juice, then reduce heat to medium-low. Let the apples simmer for 8-10 minutes until they're tender but still hold their shape. The filling should be thick and syrupy—this is what will make your tacos irresistibly moist. Remove from heat and let cool completely before assembling.
Assemble the Cheesecake Crumb Layer
Preheat your oven to 350°F and line a baking sheet with parchment paper. Divide the chilled crumb mixture into 12 equal portions (about 1.5 tablespoons each). Press each portion firmly into a 3-inch round on the prepared baking sheet, creating flat, compact discs. The edges should be slightly thicker than the center for structural support.
Bake for 12-15 minutes until the edges are golden brown and the centers feel set when pressed gently. Let cool completely on the baking sheet—this prevents them from crumbling when you transfer them to your tacos. The cooled crumbs should hold their shape but still feel tender to the touch.
Prepare the Whipped Cream and Caramel Components
In a chilled mixing bowl, whip the 1 cup heavy whipping cream with the 0.25 cup powdered sugar until soft peaks form. Set aside. In a small saucepan, gently warm the 0.5 cup salted caramel sauce over low heat until it's smooth and pourable—about 2 minutes. Keep both mixtures at room temperature for easy assembly.
For the final presentation, prepare the 0.25 cup caramel drizzle by thinning it slightly with a few drops of milk if needed. This will create elegant swirls on your finished tacos. The contrast between the creamy caramel and the spiced apple filling is what makes these tacos truly special.
Assemble and Serve the Apple Cheesecake Tacos
To assemble each taco, place one cooled cheesecake crumb round on a small plate or directly on a tortilla if serving immediately. Spoon about 2 tablespoons of the warm apple filling onto each crumb layer. Top with a generous dollop of the whipped cream mixture, then drizzle with the caramel sauce. Finish with an additional drizzle of caramel and a sprinkle of extra cinnamon for visual appeal.
Serve immediately while the apple filling is still warm and the whipped cream is light. The combination of crispy crumb, creamy filling, and sweet caramel creates a perfect balance of textures and flavors in every bite. For extra flair, arrange the tacos on a platter with fresh berries or mint leaves for a pop of color.
Pro Tips For Making Apple Cheesecake Tacos
- Bake Apples Low and Slow: I learned this the hard way—slicing apples and tossing them in a hot pan makes them turn to mush faster than you can say "cheesecake crumble." Instead, bake them at 325°F (165°C) for 15–20 minutes until just tender, not falling apart. This keeps their shape for clean, bite-sized taco fillings.
- Toast Graham Crumbs Dry: Graham cracker crumbs are the backbone, but soggy ones turn this into a sad, crumbly mess. Spread them on a baking sheet and toast at 350°F (175°C) for 3–4 minutes until golden and fragrant. Skip this, and your taco shells will dissolve before you even add the filling.
- Sweat Butter with Sugar: Cream cheese and apples are rich enough—don’t drown them in extra sweetness. Melt the butter with half the sugar first, stirring until it’s a glossy, caramelized paste. This cuts the sugar needed later and keeps the filling from tasting like candy.
- Chill Cream Cheese First: Cold cream cheese blends smoother and doesn’t turn greasy when mixed with warm apples. Take it straight from the fridge, grate or cut it into chunks, and let it sit at room temp for only 10 minutes before mixing. Any longer, and you’ll end up with a gooey disaster.
Storing and reheating your leftovers
Refrigerator Storage
Store each component separately in airtight containers to maintain freshness. The graham cracker crumb discs stay crisp for 3 days at room temperature, while the cheesecake layer and apple compote keep for 5 days in the fridge. I use glass Pyrex containers with snap-on lids—they prevent moisture transfer and keep flavors intact. Label containers clearly to avoid mixing up components. 💫
Freezer Prep
The cheesecake crumb layer freezes beautifully for 2 months—wrap individual discs in parchment paper and store in a ziplock bag to prevent freezer burn. For the apple compote, portion into 1-cup servings in silicone molds before freezing. When ready to serve, thaw overnight in the fridge and gently reheat the compote in a saucepan over low heat for 3-4 minutes to restore its syrupy texture. The whipped cream doesn’t freeze well, so make it fresh before assembly.
Reheating Components
If storing components separately, reheat the apple filling in a skillet over medium-low heat for 5 minutes until warmed through. The cheesecake crumb discs can be toasted in the oven at 350°F for 3-4 minutes to restore crispiness. For the caramel drizzle, gently warm in a microwave-safe bowl for 10-15 seconds to loosen its consistency. Always let components sit at room temperature for 10 minutes before assembling to prevent condensation.
Assembly Refresh
When ready to serve, assemble tacos just before guests arrive to keep the graham cracker discs crisp. If storing fully assembled tacos in the fridge (for up to 24 hours), cover them tightly with plastic wrap and reheat the apple filling component separately before serving. The whipped cream should always be added fresh—store-bought whipped cream can be re-whipped with a splash of heavy cream to restore its fluffiness. 🥧
Make-Ahead Tips
For parties, prep all components 2 days ahead—the flavors deepen over time. Store the cheesecake crumb mixture (unbaked) in the fridge for up to 3 days before shaping and baking. The apple compote can be made 3 days in advance and reheated before assembly. On serving day, bake the crumb discs fresh, then assemble tacos 1 hour before serving to maintain texture. This strategy ensures you spend minimal time in the kitchen when it matters most. ✨
Nutrition facts
Frequently asked questions
Can I use store-bought graham cracker crust instead of making the crumb topping?
Yes, but with caution! Store-bought crusts often contain preservatives that can make them too dry or crumbly. If you choose this route, look for a plain graham cracker crust (like Keebler's) and brush it lightly with melted butter before baking. For best texture, bake it for 8-10 minutes at 350°F to ensure it's crispy enough to support the cheesecake layer.
How do I prevent the apple filling from turning mushy?
Keep the heat medium-low after adding sugar and lemon juice, and cook the apples for no longer than 10 minutes. The filling should be tender but still hold its shape—overcooking releases too much liquid. For extra stability, add 1 teaspoon cornstarch mixed with 1 tablespoon water to the simmering apples during the last 2 minutes of cooking.
Can I make these tacos gluten-free?
Replace the graham crackers with gluten-free digestive biscuits or a mix of almond flour and coconut oil (pressed into rounds). For the taco shells, use corn tortillas or certified gluten-free flour tortillas. The cheesecake layer will still hold together beautifully—just ensure all spice blends are gluten-free (some contain anti-caking agents with gluten).
What's the best way to serve these for a large group?
Prep all components 2 days ahead and store separately. On serving day, bake the crumb discs fresh, then set up an assembly station with: - Warm apple filling in a slow cooker on low heat - Room-temperature crumb discs in a bowl - Whipped cream and caramel drizzle in squeeze bottles - Mini tortillas or plates for serving This keeps everything organized while letting guests customize their tacos.
Why did my cheesecake crumb layer turn out greasy?
This usually happens when the butter isn't fully incorporated or the mixture sits too long before baking. To fix it, press the crumb discs firmly into the baking sheet (they should be compact, not loose). For next time, chill the mixture for at least 30 minutes before shaping, and bake immediately—don't let it sit at room temperature. If it happens, toast the discs for 2-3 minutes at 375°F to crisp up the surface.