
Desserts
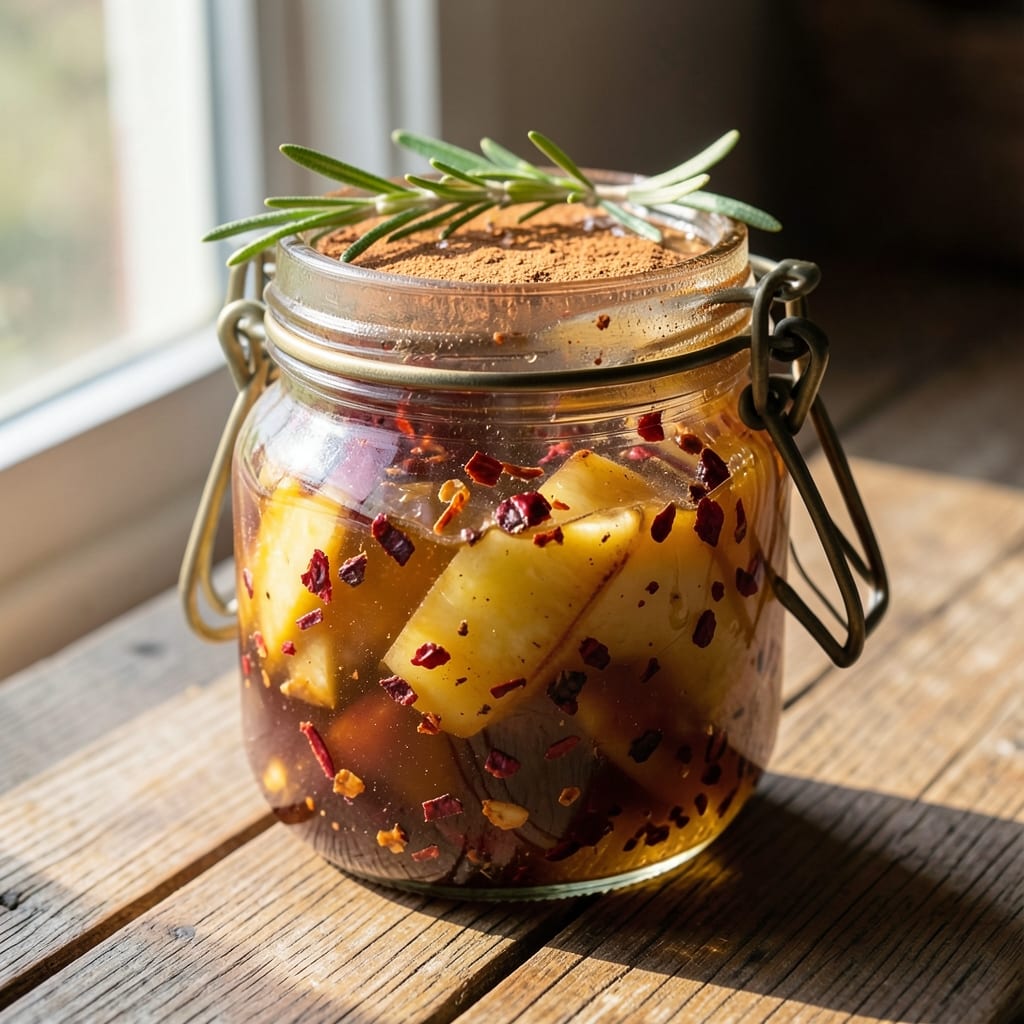
This apple and chilli jam recipe transforms tart apples into a vibrant, spicy-sweet spread that elevates everything from toast to cheese boards. The perfect balance of heat and fruitiness comes from slow-cooked apples, aromatic spices, and just the right kick of chilli—no pectin needed. What makes this recipe special is how the flavours develop over time, creating a jam that’s complex yet approachable, with a deep, caramelised richness that lingers.
The process is straightforward but requires patience—peeling, dicing, and simmering the apples until they break down into a thick, glossy consistency. A touch of vinegar brightens the flavours, while cinnamon and cloves add warmth, rounding out the chilli’s sharpness. The result? A jam that’s bold enough to stand alone but versatile enough to complement rich cheeses, spicy meats, or even vanilla ice cream for a surprising contrast.
What you’ll end up with is a small-batch jam that’s perfect for gifting or keeping in your pantry for months. The heat from the chilli mellows as it cooks, leaving behind a subtle warmth that enhances rather than overpowers the sweetness. Spread it on fresh sourdough, drizzle it over grilled pork, or serve it with sharp cheddar for a savoury-sweet pairing that’s impossible to resist.
For best results, use a mix of tart and sweet apples—Granny Smiths hold their shape while Honeycrisp adds natural sweetness. Adjust the chilli to taste, and remember: the longer it simmers, the deeper the flavours become. Let’s make this jam!
Ingredients for apple and chilli jam
Nine simple ingredients transform tart apples into a jam that's bold, spicy, and deeply flavorful.
| Ingredient | Amount | Notes |
|---|---|---|
| Granny Smith Apples 🍎 | 1 ½ lb | Peeled, cored, diced small |
| Honeycrisp Apples 🍎 | 1 ½ lb | Peeled, cored, diced small |
| Dried Red Chilli Flakes 🌶️ | 2 tbsp | Adjust for desired heat |
| Granulated Sugar 🍚 | 2 cups | White or raw preferred |
| White Vinegar 💧 | ¼ cup | For brightness and preservation |
| Ground Cinnamon 🌿 | 1 tsp | Freshly ground preferred |
| Ground Cloves 🌿 | ½ tsp | Whole cloves work too |
| Fresh Lemon Juice 🍋 | ½ cup | Freshly squeezed |
| Salt 🧂 | ½ tsp | Kosher or sea salt |
The apples are the heart of this jam—Granny Smiths for tartness, Honeycrisp for natural sweetness. Buy organic if possible (peeling is a must), and look for firm, unblemished fruit. Trader Joe's and Whole Foods usually have great selections, but any grocery store works. The chilli flakes are key here—Penzeys or La Boîte for quality, but the cheap stuff from the spice aisle works too. Just taste as you go. For the sugar, raw cane sugar adds subtle molasses notes, but white sugar keeps it neutral. The vinegar is non-negotiable—it brightens the whole thing and helps preserve the jam longer.
No Granny Smiths? Fuji or Braeburn apples work in a pinch (just add 1 tbsp extra sugar). Running low on chilli flakes? Diced fresh jalapeño or cayenne powder at half the amount gives a different kind of heat. Fresh out of cloves? Allspice or a pinch of nutmeg will still add warmth. The lemon juice can be bottled, but freshly squeezed makes all the difference—trust me, your taste buds will notice. For a deeper flavor, simmer the apples with their skins on for 10 minutes first, then peel and dice. The sugar can be swapped for maple syrup or agave (reduce other liquids by 2 tbsp), but it'll be sweeter and less stable.
This jam tastes even better after a week—the flavors meld beautifully. Store in a clean, sterilized jar with a tight seal. Keeps in the fridge for 3-4 weeks or up to 6 months in the freezer. I like to portion it into small jars for gifts—add a sprig of fresh rosemary to the jar before sealing for a pretty touch. If it crystallizes, just warm it gently and stir. The acidity from the vinegar and lemon means it won't need extra pectin, but if you're worried about shelf life, add 1 tsp of lemon pectin at the end of cooking.
Why You'll Love This Recipe
- Sweet Heat in Minutes: I swear, this comes together faster than you can chop two apples. Toss in the chilli flakes, a splash of vinegar, and let the sugar do its magic—no fancy techniques, just simmering until it’s glossy and tangy.
- Crispy-Sweet Heat Bomb: That first bite of Granny Smith’s sharp bite with Honeycrisp’s juicy sweetness? Then the chilli flakes hit—like a hug from your spicy, fruity best friend. (Yes, even on a Tuesday night.)
- Pantry Magic Anywhere: Slather it on toast for breakfast, drizzle over grilled cheese, or toss into yogurt—it’s the ultimate lazy-day fix. Honestly, I’ve even used it as a glaze for roasted chicken. Versatile enough to play hero in any meal.
- Lasts All Week: Makes enough to fill a jar, and it keeps for ages in the fridge. Between us, I’ve had this jam linger for three weeks, and it still tastes like it was just made. Budget win, flavor win.
Step-by-step instructions for apple and chilli jam
Here's how to craft this vibrant jam with perfect spice-sweet balance every time.
🍳 Step 1: Cook the Apples Until Soft
In a large, heavy-bottomed pot, combine the 1.5 lb Granny Smith Apples and 1.5 lb Honeycrisp Apples (pre-diced as specified). Add the 0.5 cup Fresh Lemon Juice and 0.25 cup White Vinegar to brighten the flavor and prevent browning. Cook over medium-high heat for 10-12 minutes, stirring occasionally, until the apples break down into a thick, chunky puree.
I like to press the apples with a wooden spoon during cooking to help them break down faster. You're aiming for a texture that's still slightly chunky—this jam should have visible apple pieces, not a completely smooth puree. When you press the apples with a spoon, they should mash easily but still have some texture.
🍳 Step 2: Add Spices and Sugar
Reduce heat to medium-low and stir in the 2 tbsp Dried Red Chilli Flakes, 1 tsp Ground Cinnamon, 0.5 tsp Ground Cloves, and 0.5 tsp Salt. Let the spices toast in the apple mixture for 1-2 minutes until fragrant—this releases their essential oils and deepens their flavor.
Next, gradually whisk in the 2 cups Granulated Sugar until completely dissolved. This is where the magic happens—the sugar will begin to dissolve into the apple mixture, creating a syrupy base. Stir constantly for 5 minutes until the mixture thickens noticeably. You'll know it's ready when it coats the back of a spoon and leaves a distinct trail when you run your finger through it.
🔥 Step 3: Simmer Until Jam Thickens
Increase heat to medium-high and bring the mixture to a full boil. Once boiling, reduce heat to medium-low and let it simmer uncovered for 30-40 minutes, stirring frequently. This long simmer is crucial—it develops the jam's depth of flavor and ensures proper gelling.
Here's the thing—you want to see the jam thicken significantly, but it shouldn't be so thick that it becomes gluey. Test the consistency by placing a small amount on a chilled plate. If it wrinkles when pushed with your finger, it's ready. If not, continue simmering for another 5-10 minutes. The jam should coat a spoon but still be spreadable, not stiff.
⏰ Step 4: Test for Doneness and Finish
Once the jam reaches the right consistency, remove it from heat and let it cool for 5 minutes. This resting period allows the flavors to meld and the texture to set slightly. Taste and adjust the seasoning if needed—add more chilli flakes for heat or sugar for sweetness, if desired.
For an extra layer of flavor, I like to finish with a quick stir of 1 teaspoon fresh lemon juice (if using) to add a final brightness. The jam should have a perfect balance of sweet, tart, and spicy flavors. Transfer to sterilized jars while still warm, leaving about ½ inch headspace at the top. Seal immediately while the jam is hot.
🥘 Step 5: Process and Store
Let the sealed jars cool completely at room temperature. Once cooled, store in the refrigerator for up to 3 weeks or process in a water bath for 10 minutes for long-term storage. The jam will continue to thicken as it cools, so don't worry if it seems slightly runny when you first jar it.
This apple and chilli jam is perfect for spreading on toast, pairing with cheese, or using as a glaze for meats. The balance of sweet Granny Smith and Honeycrisp apples with the heat from the chilli flakes creates a complex, flavorful spread that's sure to impress. Enjoy it warm or at room temperature for the best experience!
Pro Tips For Making Apple And Chilli Jam
- COOK APPLES UNPEELED: The skin adds texture and keeps the jam from turning into mush—just give them a quick scrub and leave it on. I used to peel them out of habit, and the jam lost that nice bite. Skip the peeling unless you’re obsessed with smoothness (which, let’s be honest, you’re not).
- SIMMER LOW AND SLOW: Once the apples break down, drop the heat to a gentle simmer. I learned this after watching my jam seize up and turn grainy—too much heat = sugar crystals. Stir occasionally, and let it bubble like a lazy Sunday morning, not a pressure cooker.
- TOAST THE CHILLI FIRST: Dry-toast the chilli flakes in a pan for 30 seconds before adding them to the jam. This deepens the flavor and prevents them from floating like sad, soggy ghosts. (Yes, I’ve seen it happen.)
- USE HONEYCRISP FOR JUICE: Honeycrisp apples release more juice than Granny Smiths, so use about 60% Honeycrisp and 40% Granny Smith for a jam that’s bright and balanced. I used to go all Granny Smith, and the jam was too tart—like eating a lemonade with a side of spice.
Make-ahead tips for this recipe
Prep Ahead Strategy
Peel and dice your apples up to 3 days in advance and store them in an airtight container in the fridge. The acidity from the lemon juice helps prevent browning, so add that when you're ready to cook. I like to portion the spices into small jars too—just measure out the 2 tbsp chilli flakes, 1 tsp cinnamon, and ½ tsp cloves so everything's ready when you are. 🍎
Slow Cooker Option
For a hands-off approach, use a 6-quart slow cooker on high for 3-4 hours instead of stovetop simmering. Just combine all ingredients except the sugar, cook until soft, then stir in the sugar and cook another 1-2 hours on high. The slow cooker gives you more control over the heat, which is great if you're nervous about burning. The texture might be slightly different but still delicious!
Freezer-Friendly Jars
Portion the jam into 4-ounce glass jars (like Ball or Mason jars) and freeze them flat in a single layer. Once frozen, stack them in a ziplock bag with labels. When you're ready to use one, thaw it in the fridge overnight—it'll be ready to spread the next morning. The texture stays perfect, and it's great for gifting! ❄️
Sugar Syrup Shortcut
Make a simple sugar syrup ahead of time by combining 2 cups sugar with ½ cup water in a saucepan. Heat until dissolved, then cool completely. When you're ready to make the jam, just stir this syrup into your cooked apples instead of adding sugar directly. It saves cleanup and ensures even sweetness distribution. Trust me, it's a game-changer for busy days!
Spice Toasting Tip
Toast your spices in a dry pan for 1-2 minutes before adding them to the jam. This deepens their flavor dramatically! Store these toasted spices in a small airtight container in your pantry for up to 2 weeks—perfect for future jam batches. The aroma alone will make your kitchen smell amazing while you cook. 🌿
Gifting Made Easy
For beautiful gift jars, add a sprig of fresh rosemary or a cinnamon stick to each jar before sealing. Use clear glass jars with metal lids for an elegant look. Label them with the date and a note about storage instructions. I like to tie a red ribbon around the lid for a festive touch. These make thoughtful gifts for holidays or housewarming parties! 🎁
Nutrition facts
Frequently asked questions
Can I use frozen apples instead of fresh?
Yes, but thaw them completely first and drain any excess liquid. Frozen apples work well, but they may release more water during cooking, so you might need to add 5-10 extra minutes of simmering time to achieve the right thickness. For best results, use a mix of Granny Smith and Honeycrisp if frozen.
How do I adjust the heat level?
Start with the 2 tbsp chilli flakes and taste as you go. For mild heat, reduce to 1 tbsp or use ½ tsp cayenne powder instead. If you prefer smoky depth, toast 1 tsp smoked paprika with the spices before adding. Remember, the heat mellows as it cooks!
Why did my jam turn out too runny?
This usually happens if the cooking time was too short or the apples weren't fully broken down. Return the jam to low heat and simmer uncovered for another 10-15 minutes, stirring frequently. If it's still too thin, mix 1 tsp cornstarch with 1 tbsp water, stir in, and cook for 2 more minutes until thickened.
What's the best way to use leftover jam?
Spread it on warm toast with cream cheese, swirl into yogurt for a spicy-sweet breakfast, or use as a glaze for grilled meats like pork chops. For a dessert twist, drizzle over vanilla ice cream or mix into whipped cream for a bold topping. The heat pairs beautifully with rich cheeses like brie or sharp cheddar too!
Can I make this jam without pectin?
The combination of lemon juice and vinegar helps naturally thicken the jam, while the long simmering time develops the gelling properties. Just be patient—this jam needs that 30-40 minute simmer to reach the perfect consistency. If you're worried, add 1 tsp lemon pectin at the end for extra insurance.