
Sauces & Condiments
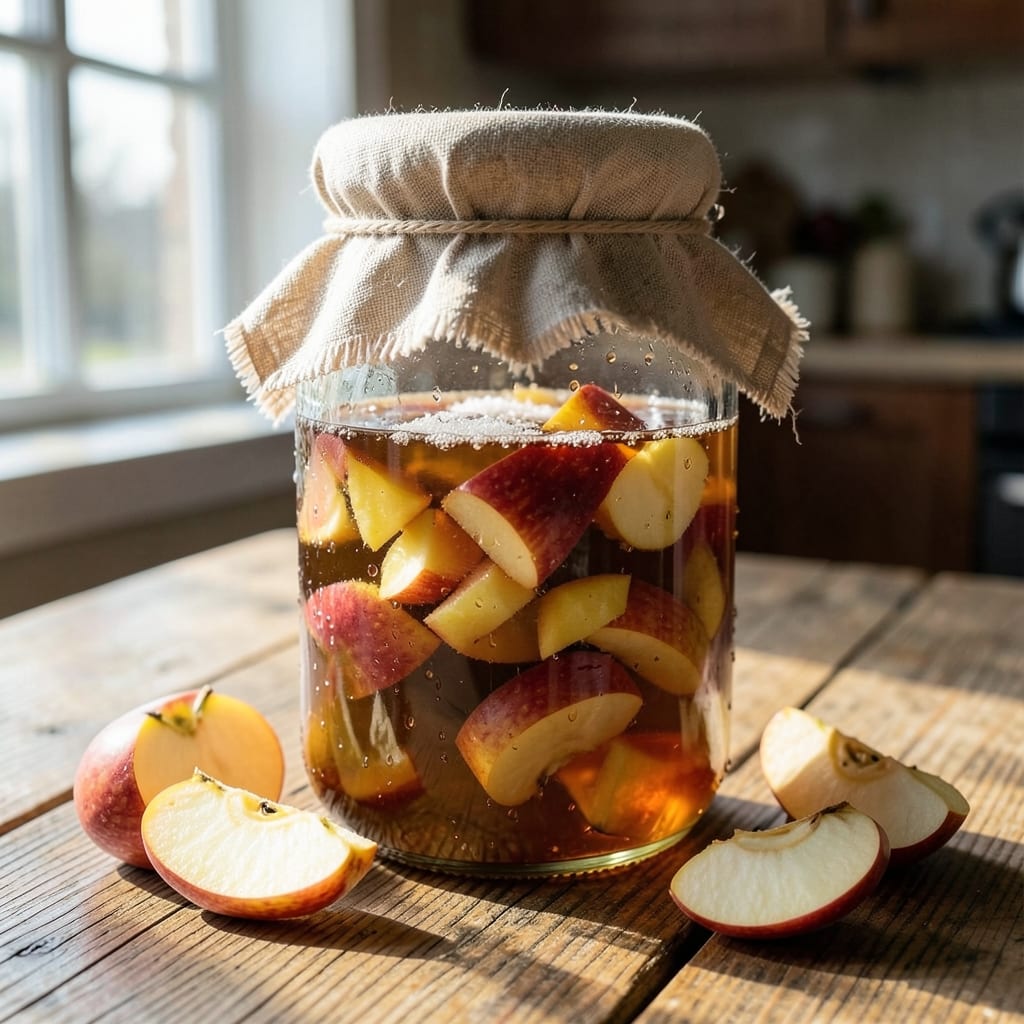
Transforming apple scraps into tangy, probiotic-rich apple cider vinegar is one of those zero-waste kitchen hacks that changes how you think about food byproducts. 💫 The process is surprisingly simple—just a few weeks of fermentation, and you'll have a pantry staple that's healthier than store-bought versions. I first discovered this method while working at Nana Mae's diner, where we'd always save apple peels and cores for homemade vinegar instead of tossing them.
The beauty of this recipe lies in its minimalist approach: no special equipment beyond a glass jar and breathable cover. You'll start with apple scraps (peels, cores, and even bruised fruit) that you'd normally discard, combining them with water and a bit of sugar to kickstart fermentation. The natural yeasts and bacteria on the apple skin do all the work, converting the sugars into vinegar over time. This method preserves all the beneficial enzymes and probiotics that commercial vinegar often lacks.
What you'll end up with is a golden, tangy liquid that's perfect for dressings, marinades, or even health tonics. The flavor develops depth as it ferments, starting sweet and gradually transforming into that classic apple cider tang. Unlike store-bought vinegar, this version carries the true essence of fresh apples—complex, bright, and full of character. Plus, you'll have a sustainable kitchen practice that turns waste into something valuable.
Once fermented, you can strain and bottle your vinegar to keep for months. The process requires patience—about 4-6 weeks—but the results are worth every day of waiting. This isn't just vinegar; it's a homemade, nutrient-rich condiment that elevates everything from salads to roasted vegetables. Let's get started turning those scraps into something extraordinary.
Ingredients for apple cider vinegar recipe with apple scraps
Just five simple ingredients transform apple scraps into vibrant, probiotic-rich vinegar.
| Ingredient | Amount | Notes |
|---|---|---|
| Apple Scraps 🍎 | 4 cups | Peels, cores, and bruised fruit |
| Filtered Water 💧 | 4 cups | Room temperature preferred |
| Granulated Sugar 🍚 | ¼ cup | White or raw cane sugar |
| Muslin Cloth or Coffee Filter 🧵 | 1 piece | Breathable cover for jar |
| Glass Jar 🍶 | 1 quart-sized | Wide-mouth preferred (or similar) |
| Rubber Band 🔗 | 1 whole | To secure cloth cover |
| Wooden Spoon 🪴 | 1 whole | For stirring during fermentation |
| Cheesecloth or Fine Mesh Strainer 🧼 | 1 piece | For straining finished vinegar |
| Dark Glass Bottles 🥫 | 2 small | For storing finished vinegar |
Apple scraps are the heart of this recipe—peels, cores, and even bruised fruit work perfectly. Local orchards or farmers markets often give away scraps for free, or save your own from baking. The sugar kickstarts fermentation, so organic cane sugar adds a touch of purity. For the jar, quart-sized mason jars are ideal—they're food-safe and easy to find at any grocery store. If you don't have a muslin cloth, a clean coffee filter works in a pinch, just secure it tightly with the rubber band to keep out debris while allowing airflow. The wooden spoon isn't mandatory but helps avoid metal contamination that could hinder fermentation.
No sugar? Honey or maple syrup works at the same ratio, though the flavor will differ slightly. Short on apple scraps? Unpeeled apples cut into chunks work too—just adjust the water to keep the scraps submerged. The rubber band might seem trivial, but it's crucial—it keeps the cloth securely in place without blocking airflow. If you don't have one, a twist tie or even a piece of string will do. For straining, a fine mesh strainer is best, but cheesecloth layered over a bowl works too. Just be patient—it'll take longer but still get the job done. The dark glass bottles are non-negotiable for storage; they protect the vinegar from light degradation that can alter flavor over time.
Once your vinegar is ready, store it in the dark glass bottles in a cool, dark place—pantry or cellar is perfect. The flavor continues developing for months, so the longer you wait, the more complex it becomes. I always make a double batch—one for immediate use and one to age for special occasions. Label your bottles with the date; most homemade vinegar reaches peak flavor in 6-12 months. The scraps left after straining? Compost them—they'll break down beautifully, closing the zero-waste loop.
Why You'll Love This Recipe
- Zero-Waste Hero: I swear by this trick—every apple core, peel, or bruised slice I’d normally toss gets repurposed. No guilt, no waste, just a jar of liquid gold sitting in my pantry.
- Sweet-Tart Magic: That balance of sugar and fermented apple? It’s like biting into a crisp fall afternoon—bright, tangy, and just a touch honeyed. Perfect for drizzling or sipping straight.
- Pantry Staple: Once it’s done fermenting, I use it for salad dressings, marinades, or even a quick pickling brine. Honestly, I’ve got a bottle of this in my fridge because it’s so darn useful.
- Cheap & Lasts: A few scraps and a pinch of sugar turn into months of vinegar for pennies. I’ve made gallons—it’s my go-to for stretching my budget without sacrificing flavor.
Step-by-step instructions for apple cider vinegar fermentation
Turn kitchen scraps into liquid gold with this simple, science-backed fermentation process.
👨🍳 Step 1: Sterilize and Prepare Your Equipment
Start by thoroughly washing the quart-sized glass jar, wooden spoon, cheesecloth, and dark glass bottles with hot, soapy water. Rinse everything with boiling water to eliminate any bacteria or contaminants. I like to use a dedicated jar for fermentation—this prevents cross-contamination from other kitchen items. While the jar is still warm, add the 4 cups apple scraps (peels, cores, and bruised fruit) and the 0.25 cup granulated sugar. The sugar will feed the good bacteria during fermentation.
Here's the thing—sterilization matters most at this stage. Any lingering bacteria can compete with the beneficial microbes you want developing. If you notice any mold or strange odors in your equipment, wash it again with a vinegar solution (yes, even before starting—this is your first vinegar lesson!). The jar should be completely dry before proceeding, so I recommend setting it aside on a clean towel while you prepare the water.
🍳 Step 2: Combine Ingredients and Start Fermentation
Pour the 4 cups filtered water into the jar with the apple scraps and sugar. Stir gently with the wooden spoon until the sugar dissolves completely. You should see small bubbles begin to form within 5-10 minutes—this is your first sign that fermentation is starting. Cover the jar loosely with the muslin cloth or coffee filter, securing it tightly with the rubber band. The loose covering allows airflow while keeping out fruit flies and debris.
Place the jar in a warm, dark spot (around 70-75°F is ideal). I keep mine in my pantry near the oven. You'll want to stir the mixture gently with the wooden spoon once daily for the first 3 days. This helps distribute the developing vinegar throughout the mixture and prevents a skin from forming on top. After 3 days, you should notice a slight tangy smell—this is the acetic acid developing, signaling your vinegar is on its way!
⏰ Step 3: Monitor and Strain at Peak Fermentation
Continue fermenting for a total of 7-10 days, stirring daily. You'll know it's ready when the liquid smells distinctly vinegary and the apple scraps have mostly broken down. The color should turn from clear to a pale golden hue. If you see any mold developing (fuzzy spots), discard the batch immediately—this means contamination has occurred. If everything looks good, proceed to straining.
After the fermentation period, carefully pour the liquid through the cheesecloth or fine mesh strainer into a clean bowl, pressing gently on the apple scraps to extract all the liquid. The strained liquid should be clear with a golden tint. You can compost the apple scraps—they're now nutrient-rich! The strained vinegar might still have some sediment, so let it settle for 24 hours before transferring it to your dark glass bottles. The sediment will naturally separate and settle at the bottom.
🥘 Step 4: Bottle and Age Your Vinegar
Using a funnel, carefully pour the clear liquid from the top of the settled mixture into the 2 small dark glass bottles, leaving behind the sediment. The dark glass protects your vinegar from light, which can degrade its quality over time. Seal the bottles tightly and store them in a cool, dark place. Let the vinegar age for at least 2 weeks—this allows the flavor to mellow and develop complexity. The longer it ages, the more mellow and sophisticated the taste becomes.
Here's a pro tip: If you want a stronger vinegar, you can add a small amount of your finished vinegar to the next batch during fermentation. This jumpstarts the process with beneficial bacteria. After aging, your apple cider vinegar is ready to use! It should have a bright, tangy flavor with subtle apple notes. If you prefer a sweeter vinegar, you can add a touch of honey or maple syrup to taste before bottling.
Pro Tips For Making Apple Cider Vinegar Recipe With Apple Scraps
- CHOP SMALLER THAN YOU THINK: I learned this the hard way—big chunks of apple peel or core take forever to break down, leaving you with murky vinegar. Aim for pieces no bigger than a dime; they’ll ferment faster and give you a cleaner, smoother result.
- WEIGH YOUR SUGAR: Eyeballing sugar leads to weak or overly sour vinegar. Use 1 tablespoon per cup of water (about 15 grams per 240ml) for a balanced tang. Too little and it won’t ferment properly; too much and you’ll end up with syrup.
- STIR DAILY—BUT NOT TOO MUCH: Give the mixture a quick swirl every 24 hours to keep oxygen flowing, but don’t overdo it—this can introduce wild yeast and make your vinegar taste off. A few seconds of gentle stirring is all it needs.
- USE A TIGHT COVER (WITH A HOLE): Skip the airtight lid—vinegar needs airflow to develop properly. Cover the jar with a loose cloth or coffee filter secured with a rubber band instead. This keeps bugs out while letting the good bacteria do their job.
Troubleshooting this dish
Moldy Mixture
If you spot fuzzy spots or a white film on your fermenting mixture, it’s a sign of mold or bad bacteria—discard the batch immediately. This can happen if your equipment wasn’t properly sterilized or if fruit flies contaminated the jar. To prevent this, always use boiling water to sterilize your jar and cover it with breathable cloth (like muslin or coffee filter) secured tightly with a rubber band. I’ve seen this happen when people skip the sterilization step—never skip it! 🚨
Weak or Sweet Flavor
If your vinegar tastes too sweet or weak after fermentation, you may not have enough acetic acid developing. This often happens if the temperature was too cold (<65°F) or if you didn’t stir daily for the first 3 days. To fix this, try fermenting in a warmer spot (like near your oven) and add a small splash of store-bought apple cider vinegar to the next batch to kickstart fermentation. Stirring daily helps distribute yeast and bacteria evenly—don’t skip this step!
Slow Fermentation
If your vinegar takes longer than 10 days to develop tang, your fermentation might be sluggish due to low temperatures or insufficient sugar. Move your jar to a warmer spot (ideal: 70-75°F) and ensure you used the full ¼ cup sugar to feed the yeast. If you’re using honey or maple syrup instead of sugar, reduce the amount slightly—½ cup honey is too much and can inhibit fermentation. Patience is key, but if it’s still slow after 2 weeks, try adding a teaspoon of your finished vinegar to the next batch to introduce more beneficial bacteria. 💡
Cloudy or Sediment-Heavy Vinegar
If your strained vinegar is cloudy or has excessive sediment, it might be due to insufficient straining or contamination. After straining through cheesecloth or a fine mesh, let the liquid sit for 24 hours—this allows sediment to settle. Pour off the clear liquid carefully, leaving the sediment behind. If the cloudiness persists, try filtering again through a clean coffee filter for a clearer result. Store your vinegar in dark glass bottles to prevent future cloudiness from light exposure. 🥫
Fruit Flies or Pests
If fruit flies or other pests invade your fermentation jar, it’s usually because the cover wasn’t secure enough. Always use a tightly secured muslin cloth or coffee filter with a rubber band—no gaps allowed! If flies are already present, discard the batch and sterilize your equipment again. To prevent future infestations, keep your jar in a pantry or cabinet away from open windows or fruit bowls. I’ve had this happen once when I used a loose lid—never again! 🪰
Off or Unpleasant Smell
If your vinegar smells rotten, sour, or like alcohol (instead of tangy), it’s a sign of bad fermentation. This can happen if the mixture was exposed to too much air (over-oxygenated) or if mold developed. To avoid this, keep your jar covered loosely (but securely) and stir daily for the first 3 days. If the smell is off, discard the batch and start fresh with sterilized equipment. A properly fermented vinegar should smell bright, tangy, and slightly sweet—like fresh apple cider with a vinegary kick. 🍏
Nutrition facts
Frequently asked questions
Can I use any type of apple scraps for this recipe?
Yes! Any apple scraps work—peels, cores, bruised fruit, even apple peels from store-bought apples. The key is using organic apples if possible, as conventional ones may have wax coatings that could affect fermentation. For the best flavor, mix varieties like Granny Smith (tart) with Honeycrisp (sweet) to balance the tang.
How do I know when my homemade vinegar is ready?
Your vinegar is ready when it smells distinctly tangy (like apple cider vinegar) and the apple scraps have mostly broken down after 7-10 days. The liquid should turn pale golden. If you see bubbles or a slight fizz when you stir, that's another good sign! Taste a tiny drop—it should be sweet-tangy, not overly sour.
What if I don't have a muslin cloth or coffee filter?
No problem! Use a clean kitchen towel, paper towel, or even a double layer of cheesecloth secured tightly with a rubber band. The goal is to keep pests out while allowing airflow. Just make sure it's breathable—plastic wrap will trap moisture and cause mold. A loose-fitting lid with small holes punched in it also works in a pinch.
Can I speed up the fermentation process?
You can't rush fermentation, but you can optimize it! Keep your jar in a warm spot (70-75°F) like near your oven or on top of the fridge. Stir daily for the first 3 days to distribute yeast. For faster results, add 1 tablespoon of your finished vinegar to the next batch—this introduces more beneficial bacteria. Just be patient; proper fermentation takes time to develop the best flavor.
How long will my homemade apple cider vinegar last?
Once bottled in dark glass, your vinegar will keep indefinitely! The flavor continues improving for 6-12 months as it ages. Store it in a cool, dark pantry away from light. After opening, it'll last 6 months if refrigerated. The longer it ages, the more complex and mellow the taste becomes—like fine wine!