
Desserts
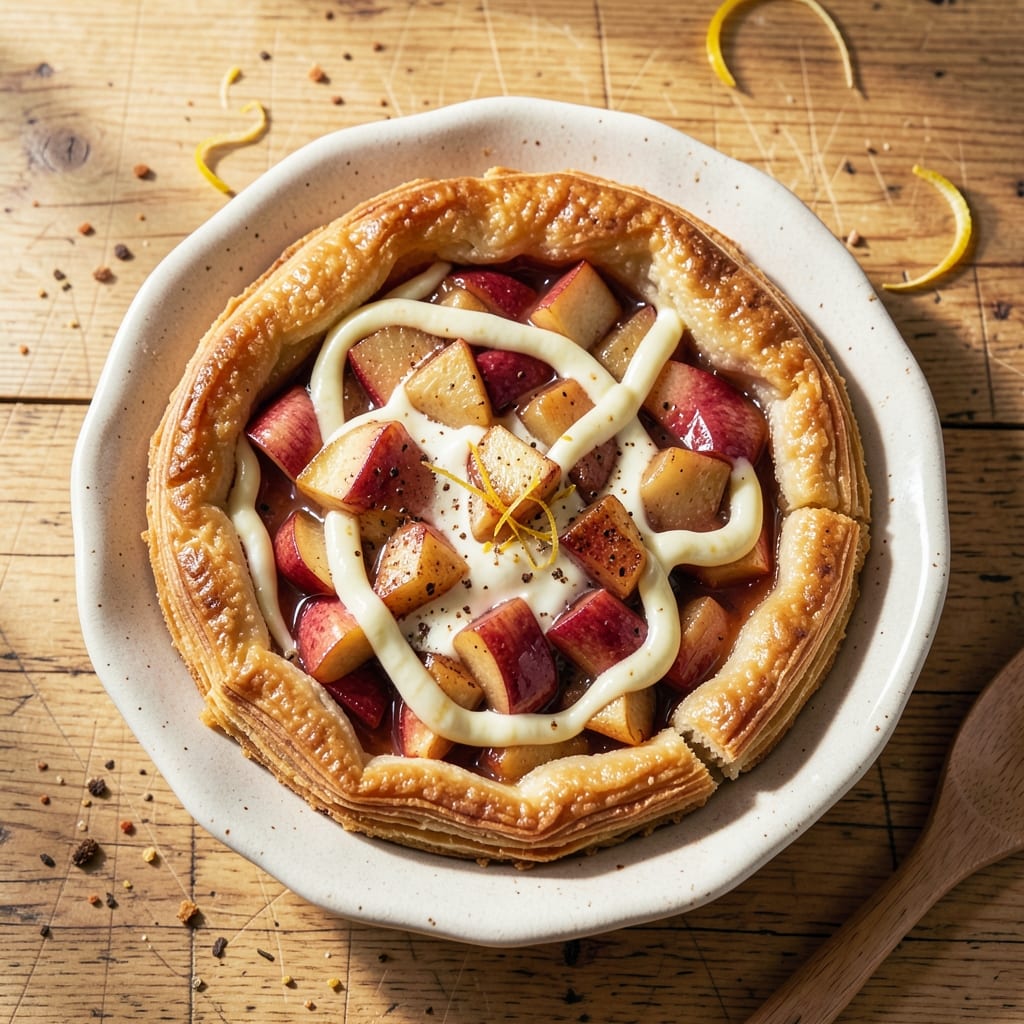
This apple cream cheese pastry recipe delivers the perfect balance of flaky, buttery layers and a sweet-tart filling that makes every bite irresistible. The secret lies in a simple pie crust technique that creates delicate, melt-in-your-mouth flakes—no fancy equipment required. I developed this recipe during apple season when I wanted a dessert that felt indulgent but still manageable for a weeknight.
The filling combines sautéed apples with cream cheese for a rich, velvety texture that contrasts beautifully with the crisp pastry. You'll start with a basic pie crust, then layer it with the warm apple-cream cheese mixture before baking until golden and bubbling. The result is a dessert that's elegant enough for company but simple enough to make regularly.
By the time it comes out of the oven, you'll have a pastry with perfectly flaky layers and a filling that's neither too sweet nor too tart—just right. The aroma alone will have everyone gathering around the kitchen. Serve warm with a scoop of vanilla ice cream or a dollop of whipped cream for the ultimate comfort dessert.
This recipe works beautifully for galettes, turnovers, or individual tarts—just adjust the baking time accordingly. The filling can also be customized with cinnamon, nutmeg, or a drizzle of caramel for extra depth. Let's get baking!
Ingredients for apple cream cheese pastry
Four apples, one creamy filling, and a crust that melts in your mouth—this pastry is pure comfort.
| Ingredient | Amount | Notes |
|---|---|---|
| All-Purpose Flour 🌾 | 2 ½ cups | Sifted for flaky crust |
| Unsalted Butter 🧈 | 1 cup | Cold, cubed for flakiness |
| Granulated Sugar 🍚 | ¼ cup | Plus 1 tbsp for sprinkling |
| Salt 🧂 | ½ tsp | Diamond Crystal preferred |
| Ice Water 💧 | ½ cup | Chilled for dough handling |
| Apples 🍎 | 4 medium | Honeycrisp or Granny Smith |
| Cream Cheese 🧀 | 8 oz | Room temperature, full-fat |
| Brown Sugar 🍚 | ¼ cup | Packed for moisture |
| Cinnamon 🍃 | 1 tsp | Ground, not cassia |
| Lemon Juice 🍋 | 1 tbsp | Freshly squeezed |
| Large Eggs 🥚 | 1 whole | For egg wash |
| Vanilla Extract 🌿 | ½ tsp | Pure, not imitation |
| Turbinado Sugar 🍚 | 2 tbsp | For topping |
The butter is non-negotiable here—European-style or Plugrá makes all the difference. Grab it from Whole Foods or your local specialty grocer if you can—store-bought brands with additives will make the crust tough. Apples should be firm but not rock-hard; Honeycrisp gives you that perfect sweet-tart balance, while Granny Smith adds zing. If you're using pre-sliced apples from the store, skip the lemon juice—they're already treated to prevent browning. For the cream cheese, Philadelphia Original is my go-to, but any full-fat block works if you grate it yourself (pre-shredded has anti-caking agents).
No butter? Coconut oil works in a pinch, though the flavor won't be quite the same. Running short on apples? Pears or peaches hold up well in this filling—just reduce the lemon juice to 1/2 tablespoon. The cinnamon can be swapped for nutmeg or cardamom if you're feeling adventurous, but stick to the same amount. No vanilla extract? Vanilla bean paste or even a scraped vanilla bean will give you that authentic flavor. The egg wash is crucial—don't skip it! If you're avoiding eggs, a mix of milk and a splash of water brushed on before baking will give you that golden sheen.
This pastry keeps beautifully—3 days at room temperature covered with a cloth, or 1 week in the fridge wrapped tightly. For longer storage, freeze individual portions for up to 3 months. I always make a double batch because it reheats like a dream—just 10 minutes at 350°F to restore that flaky magic. The filling reheats beautifully too, so you can assemble it fresh and bake later. Leftovers? Toasted brioche makes the perfect breakfast companion.
Why You'll Love This Recipe
- No-Fuss Dough: I swear by this method—just mix the flour, butter, sugar, and ice water until it clumps, then fold it into a ball. No food processor, no overworking, no stress. That cold butter keeps it tender while you roll it out, and honestly? It forgives mistakes.
- Creamy Crisp Magic: The moment that flaky, buttery pastry hits the oven with the sweet-tart apple filling and tangy cream cheese? Pure satisfaction. The sugar caramelizes just enough to make every bite taste like autumn in a bite—no one will guess it’s this simple.
- Breakfast or Dessert: Between us, this is my go-to for weekend brunch or a sneaky after-dinner treat. Serve it warm with a drizzle of honey for a fancy vibe, or cut into squares for a quick snack. My kids think it’s a cookie; my husband calls it "adulting." Win-win.
- Leftovers That Last: Bake a full sheet, slice it up, and store the pieces in the fridge for days. Reheat in the oven for 5 minutes, and it’s like it just came out. (Yes, even on a Tuesday night.) Plus, the butter and flour cost pennies—this is the kind of recipe that stretches your budget without sacrificing flavor.
Step-by-step instructions for apple cream cheese pastry
Here's how to create that perfect flaky crust with a sweet-tart filling that melts in your mouth.
Make the Flaky Pastry Dough
In a large bowl, combine the 2.5 cups all-purpose flour, 0.25 cup granulated sugar, and 0.5 teaspoon salt. Whisk gently to distribute the sugar and salt evenly through the flour. This prevents pockets of dry flour that can create tough spots in your crust.
Cut the 1 cup cold unsalted butter into small cubes and add them to the flour mixture. Using your fingertips or a pastry cutter, work the butter into the flour until you have pea-sized crumbs with some butter still visible. This cold butter method is what creates those signature flaky layers—don't overwork it or you'll develop gluten and lose that delicate texture.
Add the 0.5 cup ice water gradually, 1 tablespoon at a time, mixing just until the dough comes together. The dough should be shaggy but hold when pressed gently. If it's too dry, add a few drops more water; if too sticky, add a bit more flour. Wrap the dough in plastic wrap and refrigerate for at least 1 hour (or up to 24 hours) to fully chill and relax the gluten.
Prepare the Sweet-Tart Filling
In a medium bowl, combine the 8 ounces room-temperature cream cheese, 0.25 cup packed brown sugar, 1 teaspoon cinnamon, and 0.5 teaspoon vanilla extract. Mix until smooth and creamy—this is your base filling. The cream cheese should be completely incorporated without any lumps, which could make your filling grainy.
Peel, core, and slice the 4 medium apples into thin wedges (about ¼-inch thick). Toss them with 1 tablespoon freshly squeezed lemon juice to prevent browning and add brightness to the filling. The acidity in the lemon juice also helps balance the sweetness of the apples and brown sugar.
Gently fold the apple slices into the cream cheese mixture, reserving any liquid that collects in the bowl. This liquid contains natural fruit sugars that will caramelize beautifully during baking, adding depth of flavor to your pastry.
Assemble and Roll Out the Pastry
On a lightly floured surface, roll out the chilled dough into a 12-inch circle, about ⅛-inch thick. Transfer it to a parchment-lined baking sheet and brush the edges with the 1 whole large egg beaten with a fork. This egg wash will create a golden finish on your pastry.
Sprinkle the dough with 1 tablespoon granulated sugar (from the ingredients list) for extra caramelization. Spread the apple-cream cheese filling evenly over the dough, leaving a ½-inch border around the edges. The filling should be distributed smoothly—this ensures even baking and prevents any areas from being too heavy or too light.
Create the Lattice Topping and Bake
Roll out the remaining dough (if you divided it) or use the leftover scraps to create a second 12-inch circle. Cut this second dough into 1-inch wide strips using a sharp knife or pizza cutter. Arrange these strips in a lattice pattern over the filling, alternating directions for a classic crisscross design. Trim any excess dough around the edges.
Brush the lattice with the remaining egg wash and sprinkle with the 2 tablespoons turbinado sugar for a beautiful caramelized crust. Bake in a preheated 375°F oven for 40-45 minutes, until the pastry is deep golden brown and the filling is bubbling at the edges. The lattice should be crisp but not burned.
Rest and Serve
Remove the pastry from the oven and let it cool on the baking sheet for 10 minutes. This resting period allows the filling to set slightly and prevents it from running out when you slice. Serve warm, cutting through the lattice pattern for a beautiful presentation.
The perfect apple cream cheese pastry should have a crisp, flaky crust that contrasts with the creamy, spiced filling. Each bite should deliver a balance of sweet, tart, and buttery flavors—exactly what makes this dessert so irresistible. Enjoy it fresh from the oven for the ultimate experience!
Pro Tips For Making Apple Cream Cheese Pastry
- CHILL THE BUTTER FIRST: Take your unsalted butter out of the fridge 10 minutes before mixing—it should be soft enough to press with a finger but not greasy. I used to just cut it straight from the fridge, and the dough would turn out either too crumbly or too sticky. This step guarantees a smooth, workable dough that won’t fight you when rolling.
- WEIGH YOUR FLOUR LIKE A PRO: Skip the scooping and spoon flour directly into a bowl, then level it off with a knife. Fluff the flour first—packed flour adds extra moisture, and your pastry will turn out dense instead of light. I learned this after making two batches that were heavier than a brick.
- WORK FAST WITH ICE WATER: Keep your ice water in the freezer until you need it, then add it 1 tablespoon at a time while mixing. The dough should just hold together when pressed—any more water, and it’ll get tough. I was skeptical until I tried it; now I never go back to room-temperature water.
- REST THE DOUGH TWICE: Give the dough a 30-minute rest after mixing, then another 15 minutes before rolling. This relaxes the gluten and prevents cracking when you add the cream cheese filling. I used to skip the second rest, and the pastry would tear like brittle paper—now it’s silky smooth.
Serving suggestions for leftovers
Classic Pairings
Serve your apple cream cheese pastry warm with a scoop of vanilla bean ice cream—the cool creaminess contrasts perfectly with the warm, spiced filling. I always use Häagen-Dazs Vanilla for its rich, creamy texture that stands up to the pastry's bold flavors. For a lighter option, try coconut whipped cream—its subtle sweetness complements the tart apples beautifully. 🍦
Beverage Harmony
A chilled glass of Chardonnay with hints of apple and vanilla is ideal—look for a California or New Zealand variety for bright acidity that cuts through the richness. For non-alcoholic options, sparkling apple cider (like Martinelli's Sparkling) mirrors the dessert's flavors while adding refreshing fizz. Hot tea lovers should try Earl Grey—the bergamot notes enhance the pastry's cinnamon and vanilla. ☕
Seasonal Variations
In fall, add a sprinkle of toasted pecans or walnuts before baking for crunch and depth. For winter, drizzle with warm caramel sauce (I use Smucker's Salted Caramel) and serve with a dollop of mascarpone cheese. In spring, swap apples for peaches and top with fresh berries for a lighter, fruit-forward dessert. 🍂
Breakfast Twist
Transform leftovers into a sweet breakfast pastry sandwich—slice the pastry in half horizontally, toast lightly, and fill with Greek yogurt and a drizzle of honey. The cream cheese filling adds richness that pairs perfectly with the morning meal. For extra indulgence, add cinnamon toast crunch for crunch. 🥞
Presentation Tips
For an elegant touch, dust the pastry with powdered sugar right before serving to catch the light beautifully. Arrange slices on a wooden board with fresh mint leaves for a rustic yet refined look. Garnish with edible gold leaf for special occasions—it adds a luxurious touch without overpowering the natural flavors. ✨
Make-Ahead Serving
Assemble the pastry a day ahead and refrigerate unbaked—this lets flavors meld beautifully. Bake just before serving so the lattice stays crisp. Store baked pastries in an airtight container at room temperature for 3 days or freeze for 3 months. Reheat individual slices in a 350°F oven for 5-7 minutes to restore that fresh-from-the-oven warmth. ⏰
Nutrition facts
Frequently asked questions
Can I make this pastry without a food processor?
This recipe uses a simple two-butter method where you cut cold butter into flour by hand using your fingertips or a pastry cutter. The key is to keep everything cold and work quickly to avoid developing gluten. Just be gentle—you're aiming for pea-sized butter pieces, not fully incorporated dough. The cold butter creates those signature flaky layers when baked!
What's the best way to store leftovers?
Keep baked pastries in an airtight container at room temperature for up to 3 days. For longer storage, freeze individual slices wrapped in plastic for 3 months. Reheat frozen slices in a 350°F oven for 5-7 minutes to restore crispness. The filling stays creamy when properly stored—just avoid soggy crust by reheating quickly.
Can I substitute pie crust for the homemade dough?
Yes, but expect less flakiness. Use a pre-made pie crust (store-bought or homemade) for convenience, but roll it out to ⅛-inch thickness and blind-bake for 5 minutes at 375°F before adding filling. The homemade dough creates those magical layers through the cold butter method—pie crust won't be quite as tender. For best results, stick with the recipe's dough if possible.
Why did my pastry turn out dense instead of flaky?
Overworking the dough or using warm butter are the most common culprits. Keep everything cold and handle the dough minimally. The butter should remain in pea-sized pieces when mixed with flour. Also ensure you're using cold water and not adding too much flour—this can make the crust tough. Let the dough rest in the fridge for at least 1 hour before rolling.
How can I make this recipe gluten-free?
Replace the all-purpose flour with a 1:1 gluten-free baking flour blend (like Bob's Red Mill) and add ½ teaspoon xanthan gum to improve texture. Use cold dairy-free butter (like Earth Balance) and ensure your cream cheese is gluten-free. The lattice topping may be more delicate, so consider a solid top crust instead for better structure. Taste as you go—gluten-free crusts often need slightly more moisture.