
Desserts
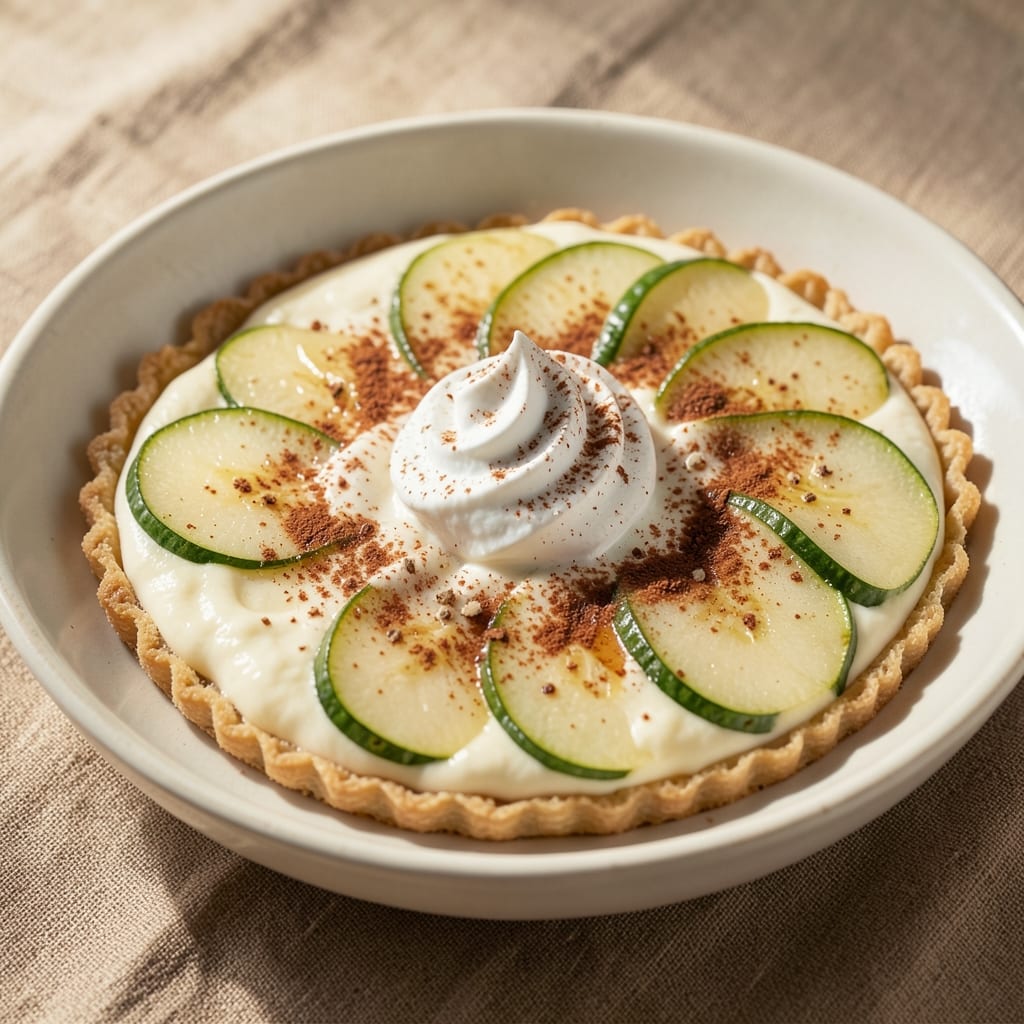
This apple cream filling recipe transforms simple apples and cream into a velvety, spiced masterpiece perfect for pies, tarts, or cakes. The secret lies in slow-cooked apples and vanilla-infused cream that creates a thick, luscious texture with just the right balance of sweetness and warmth. I developed this filling after years of testing—it’s the kind of recipe that elevates any dessert from ordinary to extraordinary.
What sets this filling apart is the vanilla-infused cream, which adds depth without overpowering the natural apple flavor. The spices—cinnamon, nutmeg, and a pinch of clove—warm the filling, while the slow cooking process ensures a smooth, thick consistency that holds its shape even after baking. No one will guess it’s made with just a few simple ingredients.
The result is a filling so rich and flavorful that it works equally well in a classic apple pie, a buttery tart, or even as a standalone dessert with a dollop of whipped cream. The apples soften just enough to blend seamlessly into the cream, creating a texture that’s both creamy and slightly rustic—like a hug from your favorite bakery.
Whether you’re prepping for a holiday gathering or craving a cozy dessert night, this filling delivers restaurant-quality results with minimal effort. Pair it with a flaky crust, a lattice top, or even a simple graham cracker base for versatility that never disappoints. Let’s get started!
Ingredients for apple cream filling
Nine simple ingredients create a restaurant-quality apple cream filling that's perfect for pies, tarts, or cakes.
| Ingredient | Amount | Notes |
|---|---|---|
| Apples (Granny Smith or Honeycrisp) 🍎 | 4 medium | Peeled, cored, sliced thin |
| Heavy Whipping Cream 🥛 | 1 ½ cups | Full-fat for best texture |
| Granulated Sugar 🍚 | ¾ cup | Or light brown sugar |
| Vanilla Extract 🌿 | 2 tsp | Pure vanilla preferred |
| Ground Cinnamon 🌶️ | 1 ½ tsp | Freshly ground preferred |
| Ground Nutmeg 🌶️ | ½ tsp | Freshly grated best |
| Ground Cloves 🌶️ | ¼ tsp | Pinch only, adjust to taste |
| Unsalted Butter 🧈 | 2 tbsp | Cold, cubed for melting |
| Lemon Juice 🍋 | 1 tbsp | Freshly squeezed |
| Salt 🧂 | ¼ tsp | Fine sea salt preferred |
| Cornstarch 🌾 | 1 tbsp | For thickening consistency |
The apples are everything here—Granny Smith or Honeycrisp give the best balance of tartness and sweetness. Local farmers markets often have the freshest, but grocery stores carry them year-round. Look for firm apples with no bruises; they’ll hold up better during cooking. I always buy a few extra just in case. The cream? Full-fat is non-negotiable—it makes the filling rich and velvety. Light cream or half-and-half just won’t cut it. If you’re in a pinch, heavy cream from Trader Joe’s or Costco is my go-to—it’s cheaper and lasts longer.
No vanilla extract? Vanilla bean paste works too, or you can scrape seeds from a vanilla bean. Running low on cinnamon? Cassia cinnamon at double the amount gives a stronger flavor. The cloves are just a whisper here—skip them if you’re sensitive to spice. For the butter, European-style brands like Plugrá melt better and add richness. If you’re making this ahead, the cornstarch helps thicken it up so it reheats beautifully. Just mix it with a splash of cold water first to avoid lumps—trust me on this.
This filling tastes even better the next day once the flavors meld. Store it in an airtight container in the fridge for up to 5 days. For longer storage, freeze it in portions—it keeps for 3 months. I like to keep a batch in the freezer at all times; it’s perfect for last-minute desserts. When reheating, warm it gently on the stove or microwave in 20-second bursts until just melted. Stir in a splash of milk or cream if it thickens too much—it happens.
Why You'll Love This Recipe
- No Peel, No Stress: I swear by this trick—just core and slice those Granny Smiths (or Honeycrisp, if you’re feeling fancy) and toss them into the pot whole. The skins soften right in, so no extra prep, no fuss, and no peeling-induced rage when the kids are staring at you.
- Creamy-Cinnamon Magic: That first spoonful of warm apples simmered with cinnamon and sugar? It’s like autumn in a bowl. Then you fold in the whipped cream—thick, cool, and just sweet enough to make you want to lick the spoon. (Between us, I’ve been known to.)
- Pie Filling or Snack: Use it in pies, of course, but also think: apple turnovers, yogurt parfaits, or even dolloped over vanilla ice cream when you’re craving something cozy. I’ve sent this to work in a thermos with graham crackers, and it’s still been devoured by noon.
- Makes More Than You’ll Use: Honestly, you’ll want to double the batch. The leftovers keep for days in the fridge, and I’ve frozen it for months—just reheat with a splash of water, and it’s like you made it yesterday. Plus, heavy cream is cheaper than takeout. Win.
Step-by-step instructions for apple cream filling
Here's how to make a velvety, spiced apple cream filling that'll make your pies and tarts irresistible.
Prepare the Apples for Cooking
Start by peeling, coring, and slicing the 4 medium apples into thin, even pieces—about ⅛-inch thick. Granny Smiths will give you a tangier flavor while Honeycrisp adds natural sweetness. Toss the apple slices with 1 tablespoon lemon juice immediately to prevent browning and keep them bright.
Place the sliced apples in a medium saucepan and sprinkle with 0.75 cup granulated sugar, 1.5 teaspoons ground cinnamon, 0.5 teaspoon ground nutmeg, and 0.25 teaspoon ground cloves. Stir gently to coat the apples evenly. The spices should smell warm and inviting—this is your first taste of the finished filling.
Cook the Apples Until Tender
Add 2 tablespoons unsalted butter and 1 tablespoon cornstarch to the saucepan. The cornstarch will help thicken the filling later, while the butter adds richness. Cook the mixture over medium heat for 8-10 minutes, stirring occasionally, until the apples soften and release their juices.
You'll know they're ready when a knife slides in easily and the mixture looks like a thick, fragrant compote. If the apples aren't tender enough, keep cooking for another 2-3 minutes. The filling should be slightly sticky but not watery—this ensures a perfect texture when combined with the cream later.
Simmer with the Cream Mixture
In a separate bowl, whisk together 1.5 cups heavy whipping cream, 2 teaspoons vanilla extract, and 0.25 teaspoon salt. Pour this mixture into the saucepan with the cooked apples. Stir well to combine, then increase the heat to medium-low and let the filling simmer gently for 5-7 minutes.
As it simmers, the cream will thicken slightly, and the flavors will meld into a cohesive, aromatic blend. You'll notice the filling become glossy and smooth—this is the moment it transforms from a simple apple mixture into a luxurious cream filling. Taste and adjust the sweetness or spice if needed, adding a pinch more sugar or cinnamon as desired.
Cool and Thicken for Perfect Texture
Remove the saucepan from heat and let the filling cool for 10 minutes while stirring occasionally. This step is crucial—it allows the cornstarch to fully activate and the cream to thicken properly. The filling should coat the back of a spoon smoothly, with no lumps or thin spots.
Once cooled, transfer the filling to a bowl and cover it with plastic wrap, pressing the wrap directly onto the surface to prevent a skin from forming. Let it chill in the refrigerator for at least 1 hour before using. This resting time ensures the filling reaches its ideal consistency—thick enough to hold its shape in pies and tarts but still luscious and spreadable.
Pro Tips For Making Apple Cream Filling
- PEEL AND GRATE APPLES: Skip the knife for the cream filling—peeling and grating the apples (skin on if you're brave) keeps the texture smooth and the flavor bright. I used to chop them, but the filling always had little chunks, and this method guarantees a silky consistency. Save the peels for a spiced apple tea if you're feeling fancy.
- COOK APPLES UNTIL SOFT: Don’t rush the simmer—cook the grated apples with sugar and cinnamon until they’re fork-tender, not just softened. I learned this the hard way when my filling turned out grainy and undercooked. A good test? Mash a spoonful—if it holds shape, keep going.
- WHISK CREAM COLD: Chill the heavy cream before folding it in, and resist the urge to microwave it "just to warm it up." Cold cream whips better and keeps the filling light, while warm cream turns it into a sad, soupy mess. If it’s too thick after mixing, pop it in the fridge for 10 minutes to reset.
- ADD VANILLA LAST: Stir in the vanilla extract right before serving—its aroma fades when heated. I used to add it early, and the filling never smelled as rich. A splash of bourbon or lemon zest here also works, but vanilla is your baseline.
Storing and reheating this apple cream filling
Refrigerator Storage
Store your apple cream filling in an airtight container (I love Glasslock containers for this) and refrigerate for up to 5 days. The flavors actually deepen overnight, making it even more irresistible. I always label my containers with the date—trust me, you’ll forget how long it’s been sitting there! 🧊
For best results, let the filling cool completely before storing. If it thickens too much in the fridge, simply stir in 1-2 tablespoons of milk or cream when reheating. The cornstarch helps maintain that perfect thick-but-spreadable texture, but a little extra liquid brings it back to life.
Freezer Storage
Freeze portions in quart-sized freezer bags (lay them flat to save space) for up to 3 months. Leave ½-inch headspace for expansion—this filling expands slightly when frozen. I like to portion it into 1-cup servings so I can grab exactly what I need for a pie or tart later. 🥶
Thaw overnight in the fridge before using. If you’re in a hurry, place the sealed bag in lukewarm water for 20-30 minutes, but never microwave it directly from frozen—that’ll turn it grainy. Stir well after thawing to restore that silky smoothness.
Reheating Methods
For stovetop reheating, transfer the filling to a saucepan and warm over low heat with 1-2 tablespoons of milk or cream. Stir constantly until just melted—about 3-5 minutes. This method keeps the texture velvety and prevents curdling. 🔥
Microwave reheating works in a pinch: Transfer to a microwave-safe bowl, cover loosely, and heat in 20-second bursts on 50% power, stirring between each burst. Avoid full power—it can turn the cream rubbery. If it thickens too much, thin it with a splash of milk while warm.
Make-Ahead Magic
This filling is a game-changer for meal prep. Make it a day ahead for pies or tarts—it tastes even better after the flavors meld. I often prepare a double batch on Sundays and freeze half for later. The spices and vanilla infuse more deeply overnight, giving you that bakery-quality taste. ✨
Pro tip: If you’re prepping for a holiday gathering, assemble your pie or tart unbaked with the filling, cover tightly, and refrigerate overnight. Bake straight from the fridge—no extra time needed, and the crust will be perfectly golden.
Nutrition facts
Frequently asked questions
Can I use this filling in a no-bake dessert? This apple cream filling works beautifully in no-bake dishes like cheesecake layers or trifles. For a no-bake tart, spread the chilled filling over a graham cracker crust and top with whipped cream. The cornstarch thickening ensures it holds its shape without baking—just
What if my filling gets too thick after refrigerating?
Simply stir in 1-2 tablespoons of milk or cream while warm to restore the perfect consistency. The cornstarch helps maintain thickness, but a little extra liquid brings it back to that silky, spreadable texture. Never add liquid to a cold filling—it won't blend properly.
Can I substitute applesauce for fresh apples?
Not recommended! The slow-cooked apples create the perfect balance of texture and flavor that applesauce can't replicate. However, if you're in a pinch, you can use 1 cup unsweetened applesauce plus 1 tablespoon lemon juice and reduce the sugar by ¼ cup. The filling will be smoother but less rustic—best for tarts rather than pies.
How do I adjust the sweetness for kids?
Reduce the sugar by ¼ cup and add ½ teaspoon extra vanilla extract to enhance sweetness naturally. Kids often prefer milder flavors, so the vanilla helps balance any tartness from the apples. For extra appeal, let them sprinkle cinnamon sugar on top before serving.
Can I make this filling dairy-free?
Yes! Replace the heavy cream with 1.5 cups full-fat coconut cream (chilled overnight) and use dairy-free butter. The texture will be slightly lighter but still delicious. For extra richness, add 1 tablespoon coconut oil** to the apple cooking step. The filling may separate slightly when cold—just stir well before using.